Estate Management System
Introduction
Estate Management manages the property under the University like the Total Number of Buildings, Floors, Rooms, Washrooms, Roads & Footpaths, Doors, Windows, Walls etc. It also provides corresponding configuration for these properties to ease the functionality of the University.
This module has the following sections:
Dashboard
Manage Buildings
Roads & Footpath
Settings
Dashboard
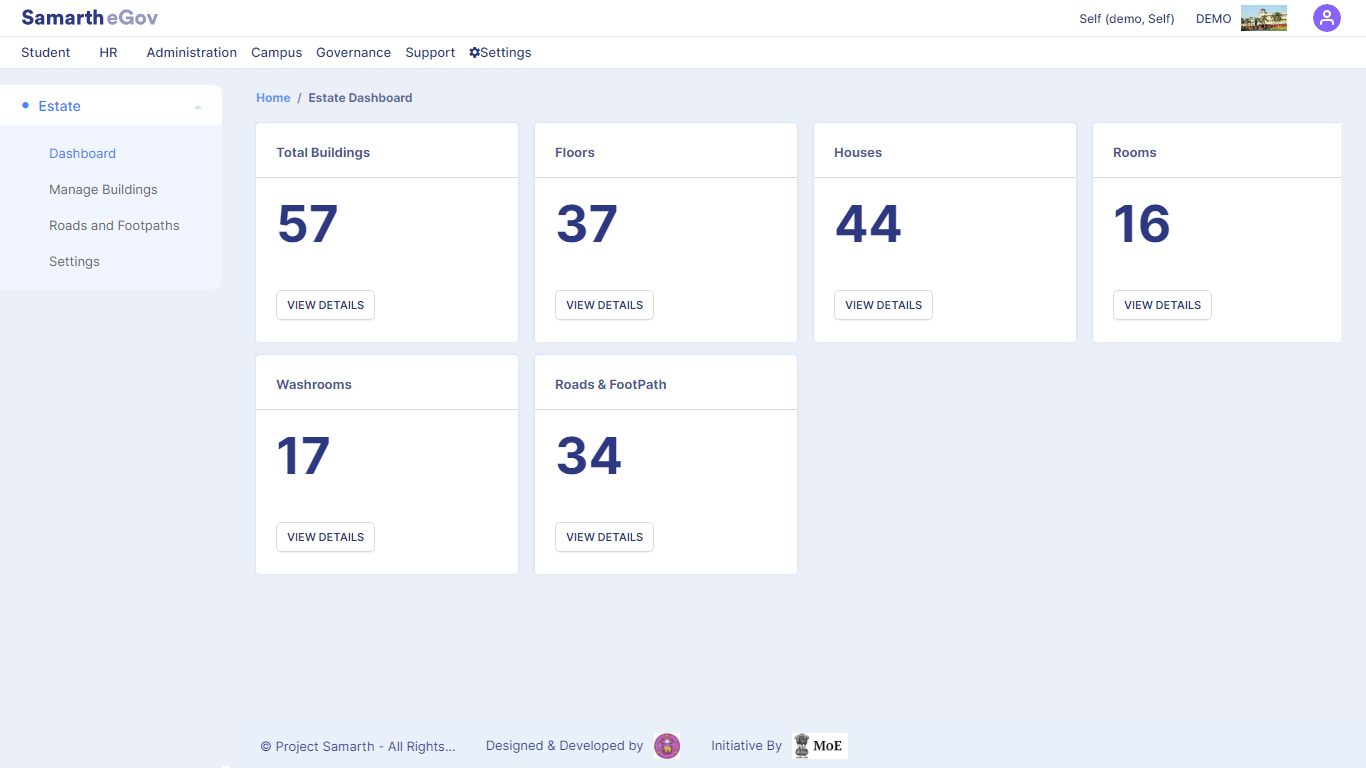
This is the home page which will contain information related to total no. of buildings, floors, rooms, washrooms, roads & footpath under the University administration.

Admin can view the estate details by clicking on View details for any particular entry. This will take them to a new page where he/she cannot only view but can also manage the building information.
Manage Buildings
After clicking on view details, the admin will be taken to a new page where they can manage the information.
Admin can see the few details of existing buildings like the name of the building, its location (landmark), the name of campus it is located in and can manage it from here.
Additionally, you can view this section via Estate Dashboard. Click on View Details under the Total Buildings section.
Admin can also type in the space given below of each column to filter out particular building details from the rest.
If the admin wants to perform some action like view/edit/delete complete details for a particular building, then it can be done by clicking on the View, Edit or Delete icons present in front of every row corresponding to the building on the right side.
This is the section which will contain information like total no. of buildings, floors, rooms, washrooms, roads & Footpath under the University Administration.
All the buildings, their different types and parts will be listed here, for example:
Buildings
Floor (in the respective building)
Rooms (in the respective building)
Washrooms
Admin can add a new Building Image (if any) and upload it by clicking on the tab Add Building Image present on the bottom left side of the portal.
Admin can update the current details of the building or delete it or can take out a print out of the information in the form of PDF by clicking on tabs present at the right side of the portal.
Admin can even add new buildings accordingly if new construction has been done by clicking on the tab Add New Building present on the top right side of the portal.
After adding details about the building, the admin can submit it by clicking on the submit tab. Once the details are submitted they can be viewed in the All Building section.
Similarly, for rooms, floors, washroom admin can view/add/delete/print details in a similar way corresponding to their section.
Roads and Footpath
While clicking on roads & footpath sub section, admin can view information like width, length, type of roads, and footpath.
Admin can view/edit/delete details in a similar way as of buildings according to the action.
Admin can also type in the space given below of each column to filter out particular Road details from the rest.
Admin can add a new road by clicking on the Add New Road tab present on the top right side of the portal.
Once all the details are filled, click on the submit button. After submitting, new entry will appear on the Roads & Footpath subsection with all other entries.
Settings
If the admin wants to know information about the type of walls, doors, window, structures, etc then it can be found under the Setting subsection of the estate module.
Following are the Settings that the admin can configure in this module:
a. Type of External Wall
b. Type of Foundation
c. Type of Roofs
d. Type of Sub-station
e. Type of Structures
f. Floor Levels
g. Floor Categories
h. Type of Window
i. Type of Door
j. Type of Flooring
k. Type of Railing
l. Type of Road
m. Type of Footpath
n. Type of House
Admin can simply click on the Settings icon present on the right side of each row for further details and action.
Admin can view the details through the eye icon which will take him to the next page where he can make the updates or can delete it accordingly or can directly edit the details by clicking on edit icon.
Admin can add a new type for each entry in the Setting subsection also by clicking on Add new type. Once filling all details click on Save.
Annexure
Roles in Module
| Role Name | Description |
|---|---|
| estate_admin | This role will be provided to the Estate Administrator, who handles all the estate-related details in the university. |
Workflow Diagrams
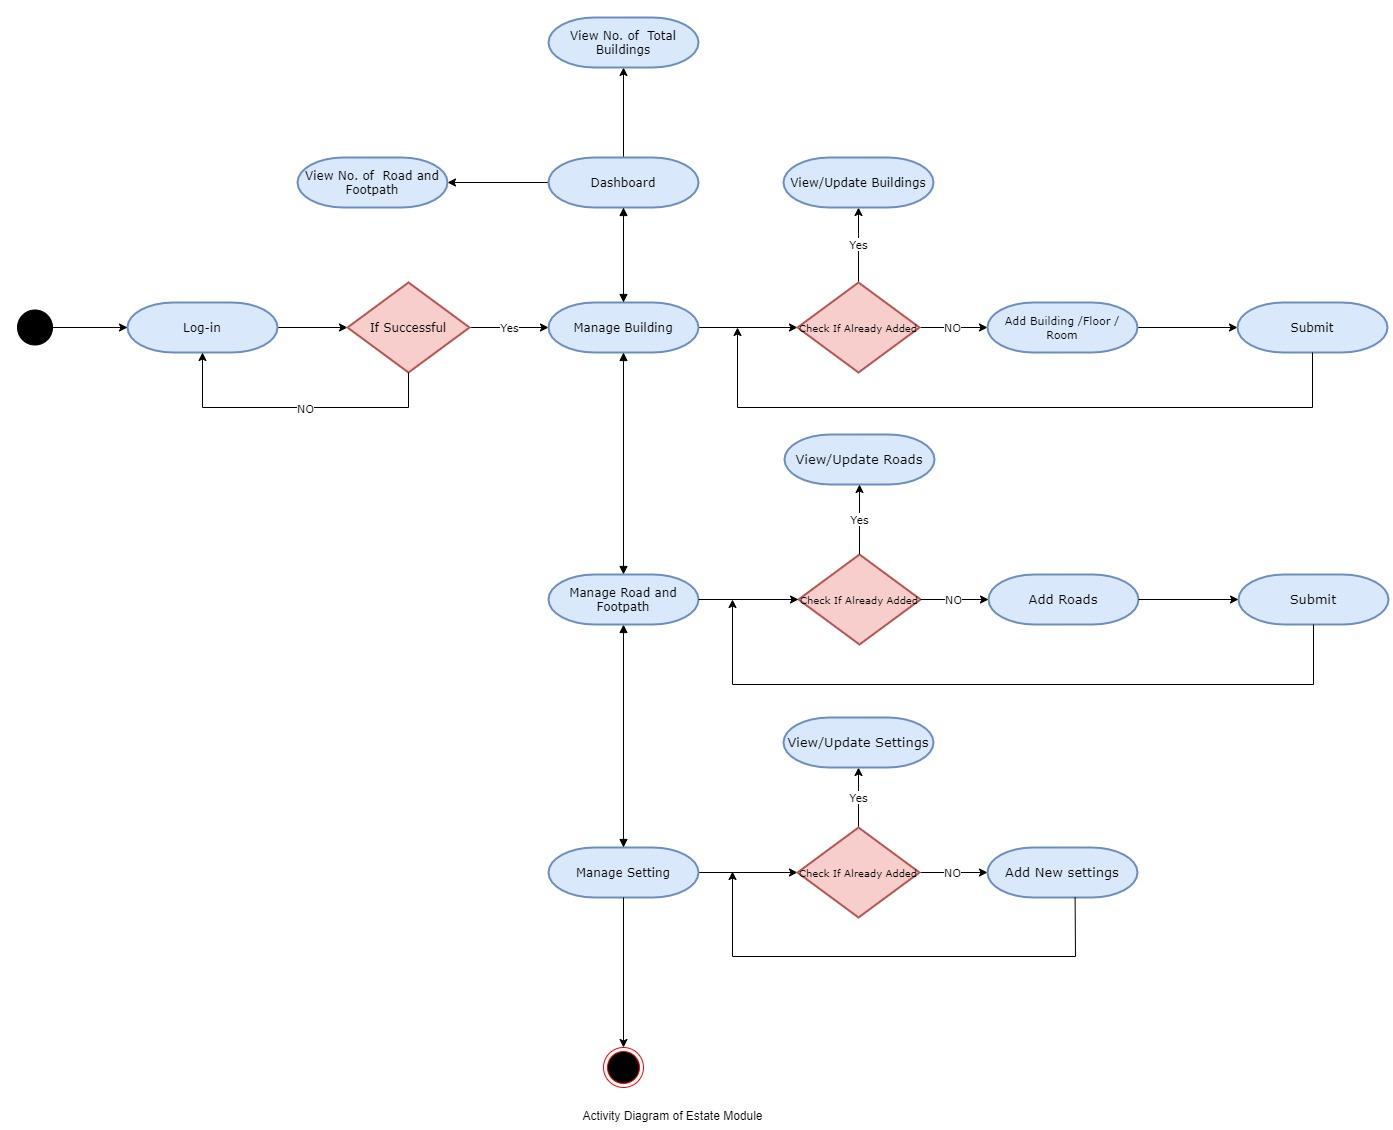
Activity Diagram

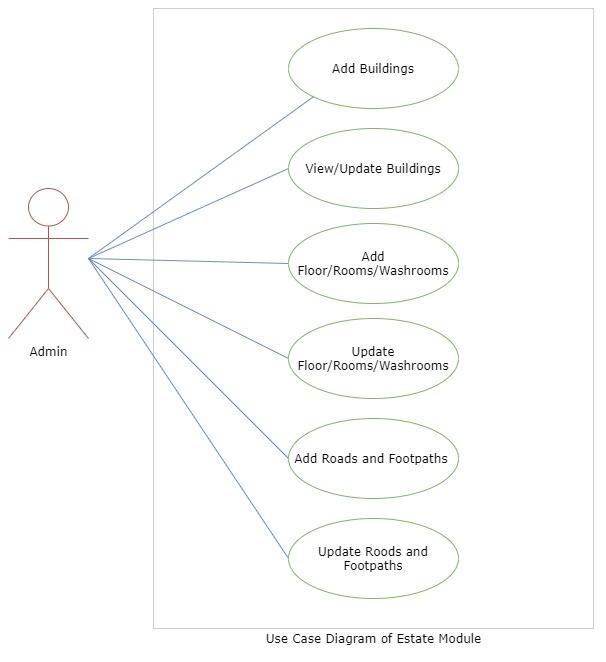
Use Case Diagram
