Content Federation System System
Content Federation System (Overview)
The document is a complete guide for the Content Federation System (CFS) module to manage web content, allowing multiple contributors to create, edit, and publish.
Roles
The CFS document comprises of two roles for the users:
1. cfs_admin: This Role is for the admin of the Content Federation System. It provides the rejection or approval rights of the content to the module admins.
2. cfs_ou_admin: This role is for the users who requested content to be published on the website. The users will be from various organizational units. 3. cfs_reviewer: This role is for the users who reviewed the content provided by the department. |
| Role Name | Description |
|---|---|
| cfs_admin | This role is having the rights of approval/rejection of the contents. |
| cfs_ou_admin | This user can create a document and send it to get published, without having any rights to approve/reject contents. |
| cfs_reviewer | In this role the reviewer can review the content provided by the department. |
Settings
In this section, cfs_admin can customize the settings of the module Content Federation System (CFS). Users just need to click on the Gear button to configure the selected setting. Following are the settings of the Content federation system:
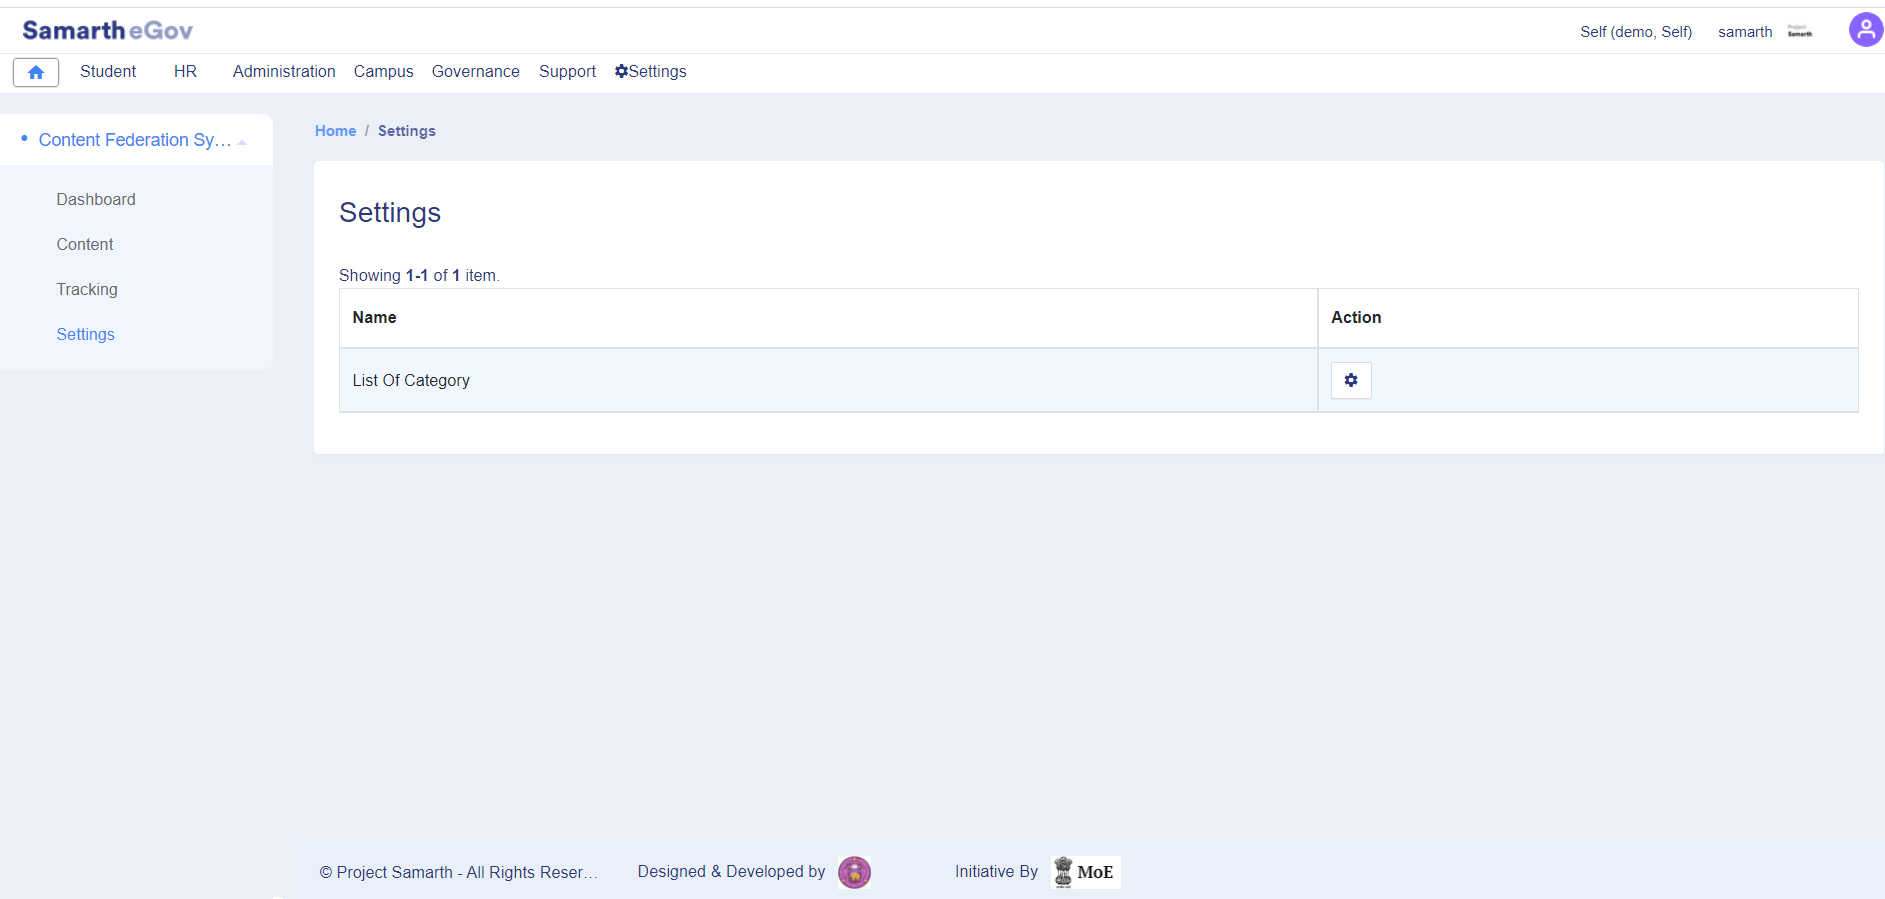
- List Of Category
Note: Before using the module, cfs_admin needs to be configured as per the workflow of the University.
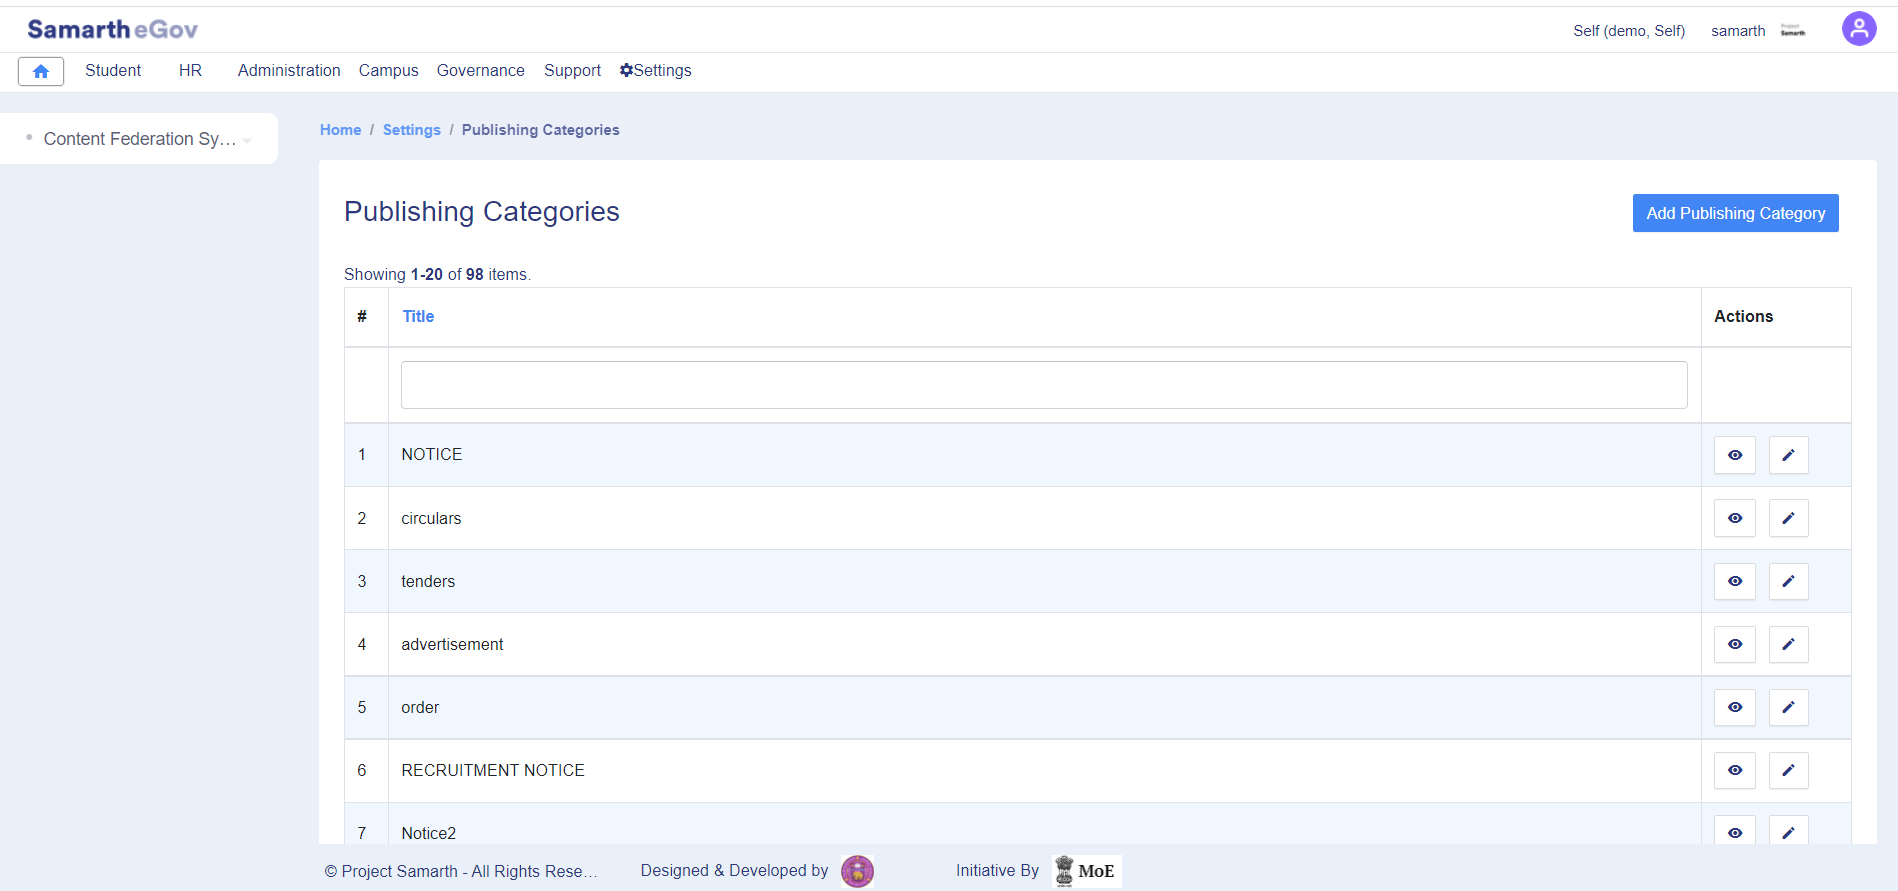
List of Category
In this section, cfs_admin has to add the details of the publishing category, i.e., Notice/Circular.
Steps to be followed to add List of Category
- Click on the gear button in front of the List of Category.
- Click on the Add Publishing Category button.
- Fill in the required details, i.e., Title and click on the Save button.
Publishing category details will be added after saving the updates.
Content
In this section, cfs_admin/ cfs_ou_admin can view various types of content. An admin can also view which user has added a particular category.
Steps to add Content
- Click on the Add Content button provided at the top right-hand side.
- Fill in the required details, i.e., Type of content,Title, Description, start date, End date, Post Expiration Date click on the Add button.
- Click on the Submit button.
Note: cfs_ou_admin can only see the contents of his organizational unit.
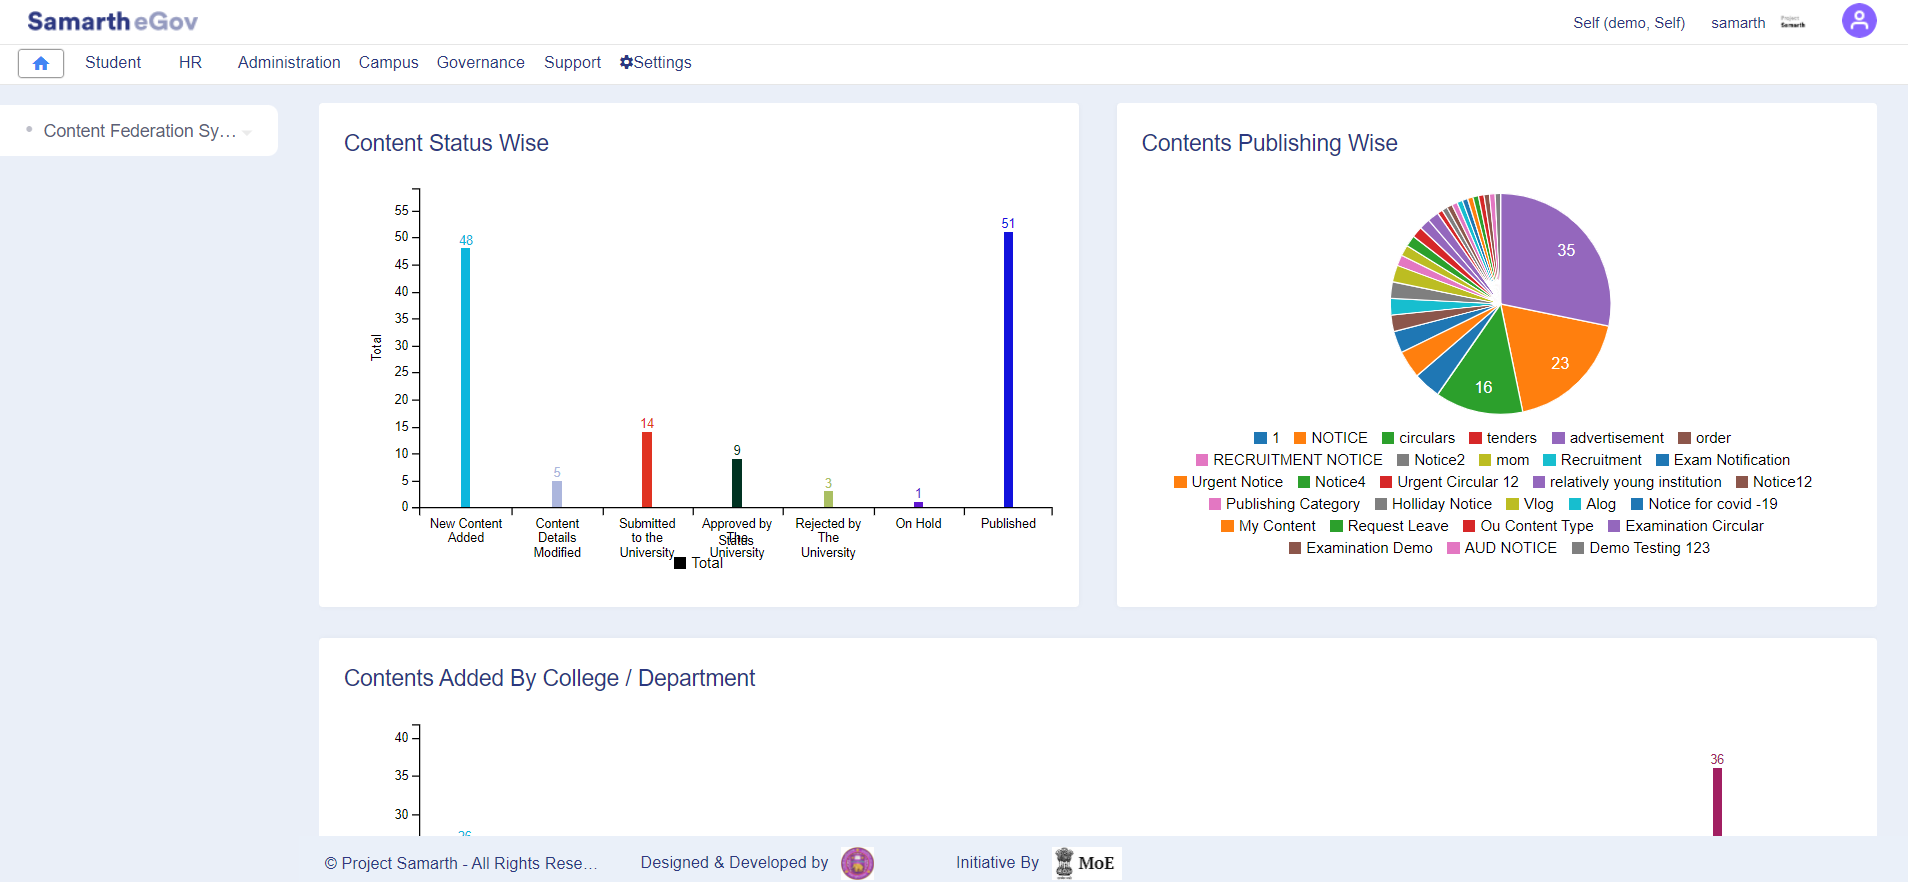
Tracking
In this section, cfs_admin/ cfs_ou_admin can keep track of various contents that are approved or published in the CFS Module.
Steps of tracking
- Click on the track button provided under details.
- Users can view the lifecycle of the content and can view the status, i.e., Published, Approved.