Alumni Module
Introduction
The Alumni module aims to build a system that will handle alumni requests and manage alumni data of a college, providing easy access to the same. It will have three types of users:-
Admin: The admin will be responsible for approving incoming alumni. The admin will also have to ensure that graduating students are shifted into the alumni module.
Alumni_ou_admin: The Organisational Unit admin will be responsible for approving incoming department alumni. The admin will also have to ensure that graduating department students are shifted into the alumni module.
Alumni: An alumnus of the college will be able to access other alumni information and also will be able to view all their contact information (unless it is made private).
Contents of the Module:
- Dashboard
- Registered Alumni
- Verified Alumni
- Rejected Alumni
- Membership
- Membership Fee
- Export
- Settings
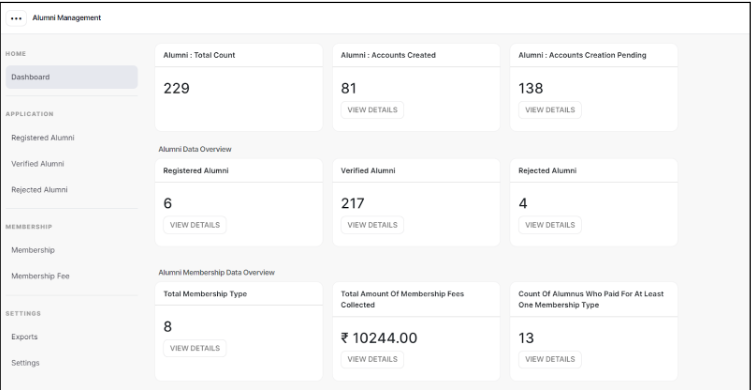
Dashboard
A dashboard is a visual display of all relevant data. Its primary intention is to provide information at-a-glance. The Alumni Module Dashboard shows:
- Total Registered Alumni
- Verified Alumni
- Alumni: Account Created
- Total Fee received
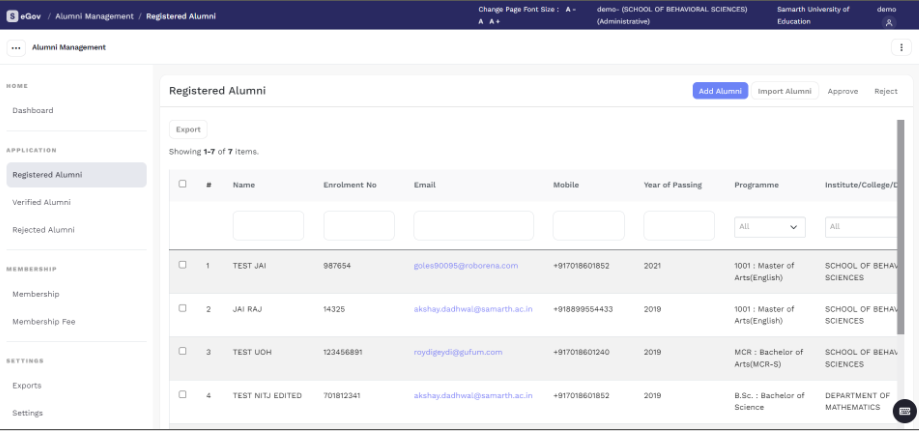
Registered Alumni
When the student graduates from the university/College, s/he becomes alumni of the university. All Registered Alumni will be reflected here. After registration, the request goes to the admin for approval and appears in this section. Admin can then click on the Approve button to approve the request.
In Case the registered Alumni data is not correct as per the University records, the module admininstrator can reject such entries. Thereafter, these entries will get reflected under the “Rejected Alumni” tab.
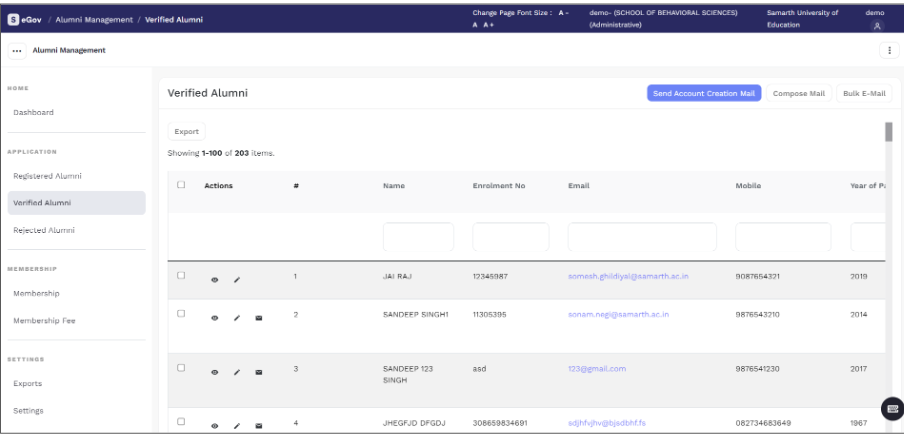
Verified Alumni
When the admin approves the list of students and requests registered as alumni, then the list of verified alumni details will appear in this section.
Once verified, an email is sent out to these Alumni where they can create their login credentials and further may login to the portal as an existing Alumni.
Rejected Alumni
When the Module admin rejects the registered alumni based on the information provided by the Alumni, they get reflected under the “Rejected Alumni” tab.

Add Alumni
Admin can add the list of verified alumni by clicking on the "Add Alumni" button present on the top right side of the portal and fill in the required details:
- Programme (Select from the drop-down)
- Name
- Year of Passing(Select from the Calendar)
- Enrollment Number
- Institute/College/Department(Select from the drop-down)
- Mobile
Import Alumni
Admin can add the bulk alumni by clicking on the "Import Alumni" button.
After clicking on the "Import Alumni," an Import Alumni will open; for downloading the prescribed format, click on the "Download Excel Format" button.
Fill all the details in the "Excel Sheet" in the prescribed format to save the excel file. The details which are needed:
- Name
- Programme_code
- Year of Passing
- Enrolment Number
- OU Code
- Mobile
To select the excel from the computer, users have to click on the button "Browse File From Computer", then select the file.
To upload the selected excel file, users have to click on the button "Upload The File", then the next page reflects all the data of the file that will be uploaded into the system. Users can check the data then click on the "Submit" button to finally upload the file.
It has to be noted that the Alumni data imported by the Module admin is deemed verified and hence get reflected directly under the “Verified Alumni” tab.
Send Account Creation Email
Admin can send the bulk Account creation email to Alumni. Admin selects the Alumni and then clicks on the "Send Account Creation Email". It will send the email to all selected Alumni.
Admin can send the Account creation email to Alumni. Admin select the Alumni and then clicks on the Email icon. It will send the email to all selected Alumni.
Settings
This section contains the configuration detail related to the Alumni Management module.
Only the admin with the rights of Alumni_Admin can view and access it. The Alumni settings contain:
- Mail Templates
- OU Admin Mappings
- Contribution area
- Additional Fields
- ID card settings
- Alumni ID prefix
Mail Templates
These Settings show all the email templates, and the admin can create email templates for sending emails to the Alumni by clicking on "Create Mail Template".
After clicking on "Create Mail Template," the admin have filled in all details and save:
- Mail- Mail type
- Subject - Subject of the email
- Mail Body- It includes all the necessary details.
- Status- Active or inactive status
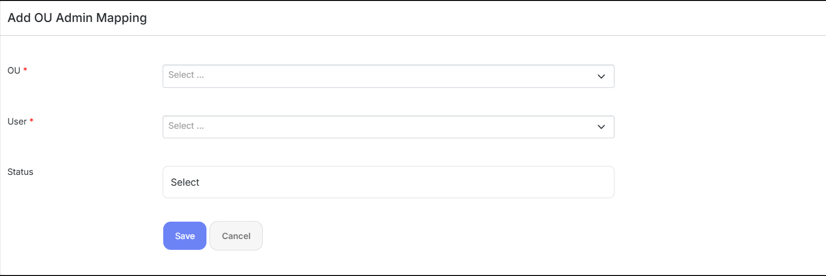
OU Admin Mappings
In this field, we can define and map different Organisation Units with their Users (Head of Department). This is done to club/group different departments with their Users (Head of Department).
Admin can view the details by clicking on the icon available in front of every entry.
Admin can edit/update the details by clicking on the icon available.
This functionality can be used to segregate the funtionality of the module on OU?department level. An Alumni OU admin will have access to the Alumni data only relevant to their assicated OU. The OU admin can register, verify, import, reject alumni registrations related to their partiular OU.
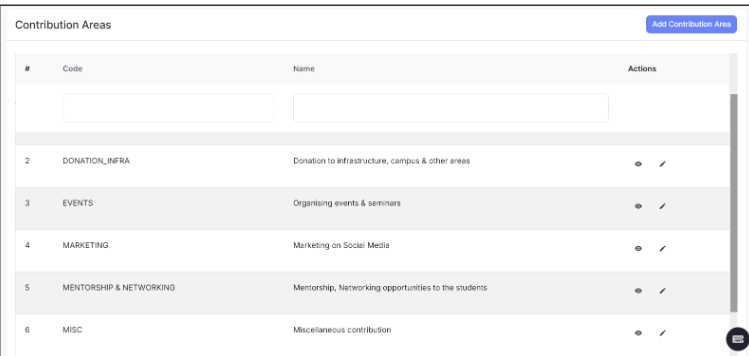
Contribution area:
To configure various areas of contribution that the alumni can opt for in their profiles.
The Alumni have the visibility of the Contribution areas configured by the Module Administrator. If the Alumni wishes to Contribute to the University/Institute, they may select the concerned Contribution area and provide the description of the Contribution.
The Contribution areas selected by the Alumni are also visible to the Module admin.
Logins
There will be three types of the login:
Alumni_Admin
who can approve the request of students to be alumni of the university and can add verified alumni details.
Steps to be followed
Step 1:- Login as Alumni admin to view the Alumni Section.
Step 2:- To approve the request of students to be alumni of the university, go to "Registered Alumni".
Step 3:- To add verified alumni details, go to "Verified Alumni".
Step 4:- Send Account creation email to Verified Alumni.
Alumni_ou_admin
Who can approve the request of their department students to be alumni of the university and can add verified alumni details.
The Alumni Admin User ID:
- Dashboard
- Registered Alumni
- Verified Alumni
Steps to be followed
Step 1:- Login as Alumni admin to view the Alumni Section.
Step 2:- To approve the request of students to be alumni of the university, go to "Registered Alumni".
Step 3:- To add verified alumni details, go to "Verified Alumni".
Step 4:- Send their departmental Alumni Account creation email.
Alumni_user
Alumni users can log in to their accounts by click on the link provided by the university. Alumni have to click on "here".
After clicking on the link, the user can create his password for login.
Then Alumni users have to login into the portal by using their credentials.
The Alumni User has:
- Personal Details
- Programs Studied in University/HEI.
- Qualification
- Experience
Personal Details
The Alumni User can view their details and also update details by clicking on "Edit Profile".
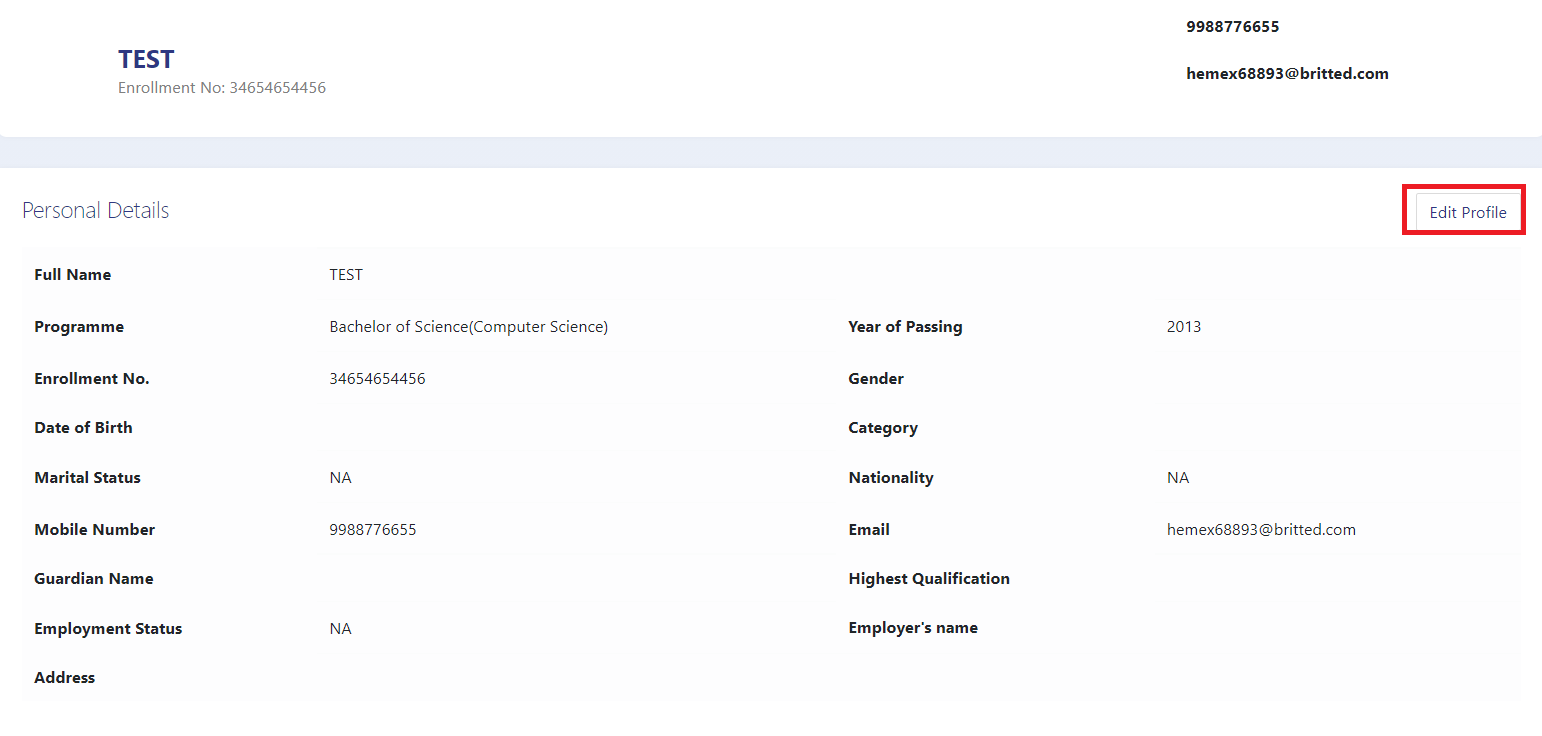
After clicking on the button, the update profile will open, and the user can update their details.
- Guardian Name
- Category
- Nationality
- Gender
- Marital Status
- Date of Birth
- Employment Status
- Employer Name
- Highest Qualification
- Add Photo
- Add Resume (in pdf or Doc formats)
- Address
- Social Media profiles like Linkedin, Facebook, Instagram.
Programs Studied in University/HEI
The Alumni User can view their Programme studied in University/HEI details, and they can add details by clicking on "Add".
After clicking on the "Add" button, the Alumni users can add the details.
- Organisational Unit (Department Name)
- Programme (Programme Studied)
- Year of passing
Qualifications
The Alumni User can add their Qualification details by clicking on "Add".
After clicking on the "Add" button, Alumni users can add the details.
- Level (Bachelor, Master, PhD)
- Degree (Programme Studied)
- Result Type (Percentage or Grade)
- Aggregate Score
- Year
- Institute (Name of the Institute)
Experience
The Alumni User can add their Experience by clicking on "Add".
After clicking on the "Add" button, the Alumni user can add the details.
- Name of Institute /Organisation
- Designation
- Employment Status
- Pay Scale/ Consolidated salary
- From Date (Start Date)
- To date (End Date)
Steps to be followed
Step 1:- Click on the link provided by University/HEI.
Step 2:- Submit the password.
Step 3:- Log in using the User ID and Password.
Step 4:- Add/update profile details, Programme Studied, Qualification, and Experience.
Diagram
Activity Diagram

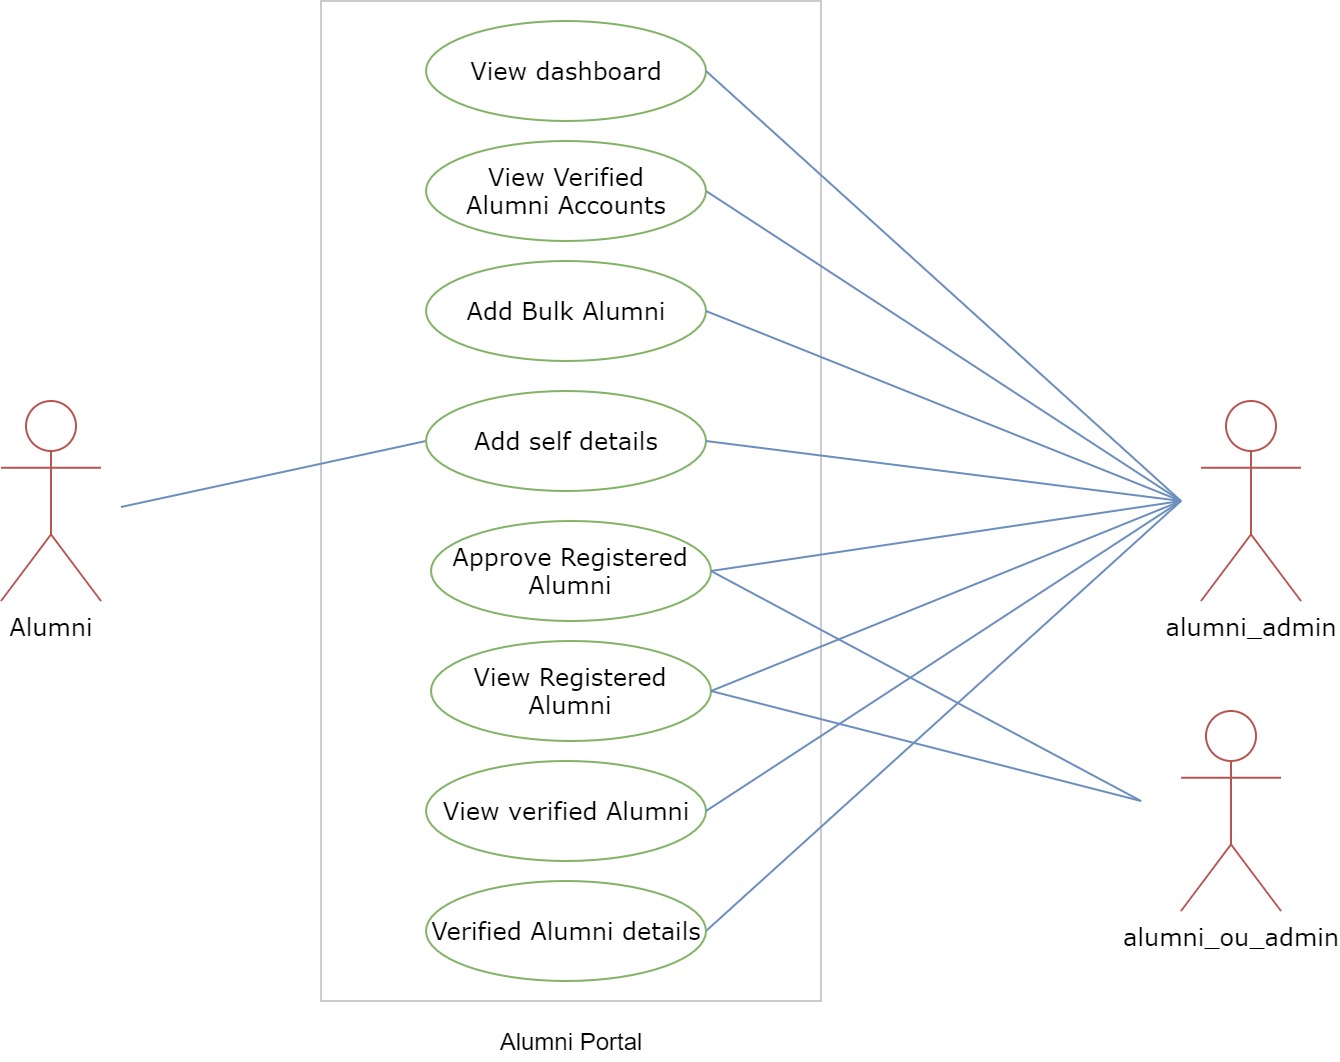
Use Case Diagram
Glossary
| Sl. No. | Term | Definition | Module Reference |
|---|---|---|---|
| 1 | OU Admin Mappings | It is a provision to assign department-level users for the purpose of task segregation. | Alumni |
| 2 | Contribution Area | Module admin can define areas in which the University opts to take contributions from the Alumni. Alumni can select the Contribution areas from their login, as per their suitability. | Alumni |
| 3 | Add Alumni from other Country | This is a non-editable field. It allows Alumni residing in foreign countries to be able to register in the portal. | Alumni |
| 4 | Registered Alumni | It is the database of all freshly registered Alumni. These entries need to be verified/Rejected after verification from the Admin. | Alumni |
| 5 | Verified Alumni | It is the database of all the Alumni, who have been verified by the Module Admin. | Alumni |
| 6 | Rejected Alumni | It is the database of all the Alumni whose registrations are rejected by the Module Admin post verification. | Alumni |