Admission Admin guide
| Document Title | Admissions Admin Guide |
|---|---|
| Document Number | ADM - 001 |
| Author(s) | Senior Solution Architect, Product |
| Approved by | Senior Manager, Operations |
| Approval Date | March 27, 2025 |
Introduction
The Admission Management System is designed to streamline and simplify the admission process for universities and institutions. This Admin Guide provides step-by-step instructions for configuring admission settings for different admission modes offered by Samarth, including Merit-Based, Open Distance Learning (ODL), Foreign Student Registration, CUET UG, CUET PG admission portal.
Upon logging into the portal, administrators will have access to the Admin Dashboard, where they can configure admission settings as per institutional requirements. The following guide will assist universities in setting up and managing the admissions process to ensure a seamless experience for applicants.
Note: The configurations mentioned in this guide apply to Merit/Entrance Based, Open Distance Learning, Foreign Student Registration, CUET UG,CUET PG, NCET and JEE/JOSAA admission mode.
| S.no. | Role Name | Description |
|---|---|---|
| 1. | admission_admin | This role is responsible for configuring all admission settings and being able to process all admission processes. |
| 2. | admission_programme_administrator | This role is responsible for processing admission processes like document verification, shortlisting for admission, etc with assigned programme only. |
| 3. | admission_document_verifier | This role is responsible for the document scrutiny process only. |
Admission Admin needs to click on “Admission” in the left navigation panel.
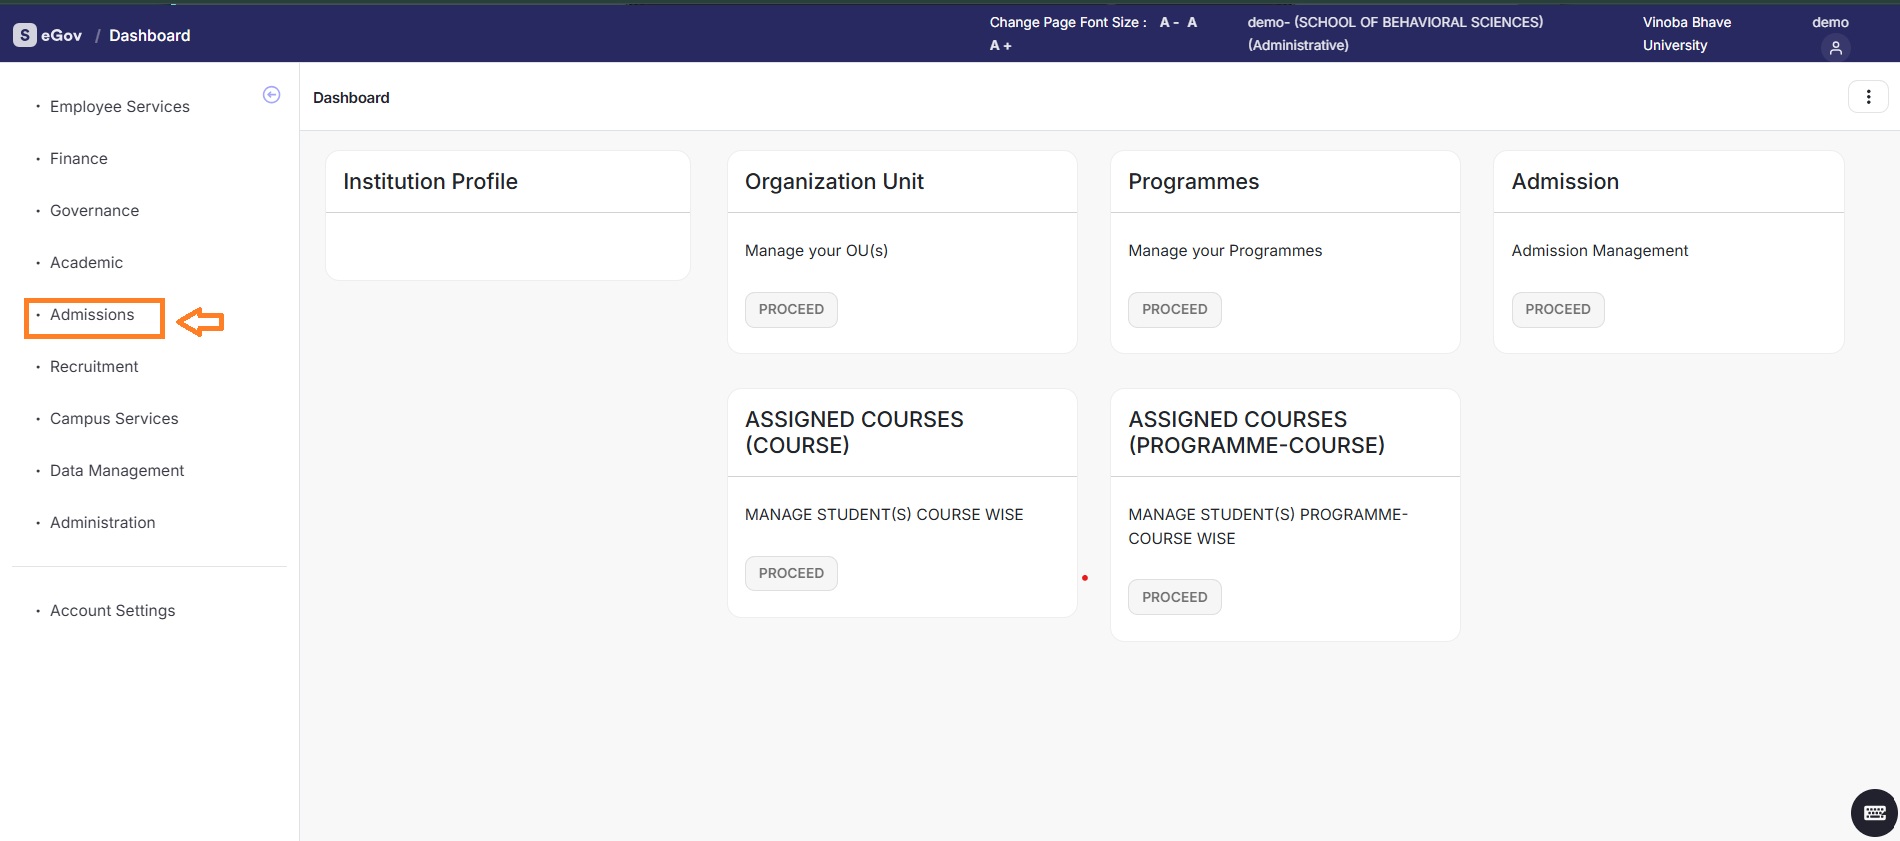
Then click on “Admission mode type” to access the Dashboard.
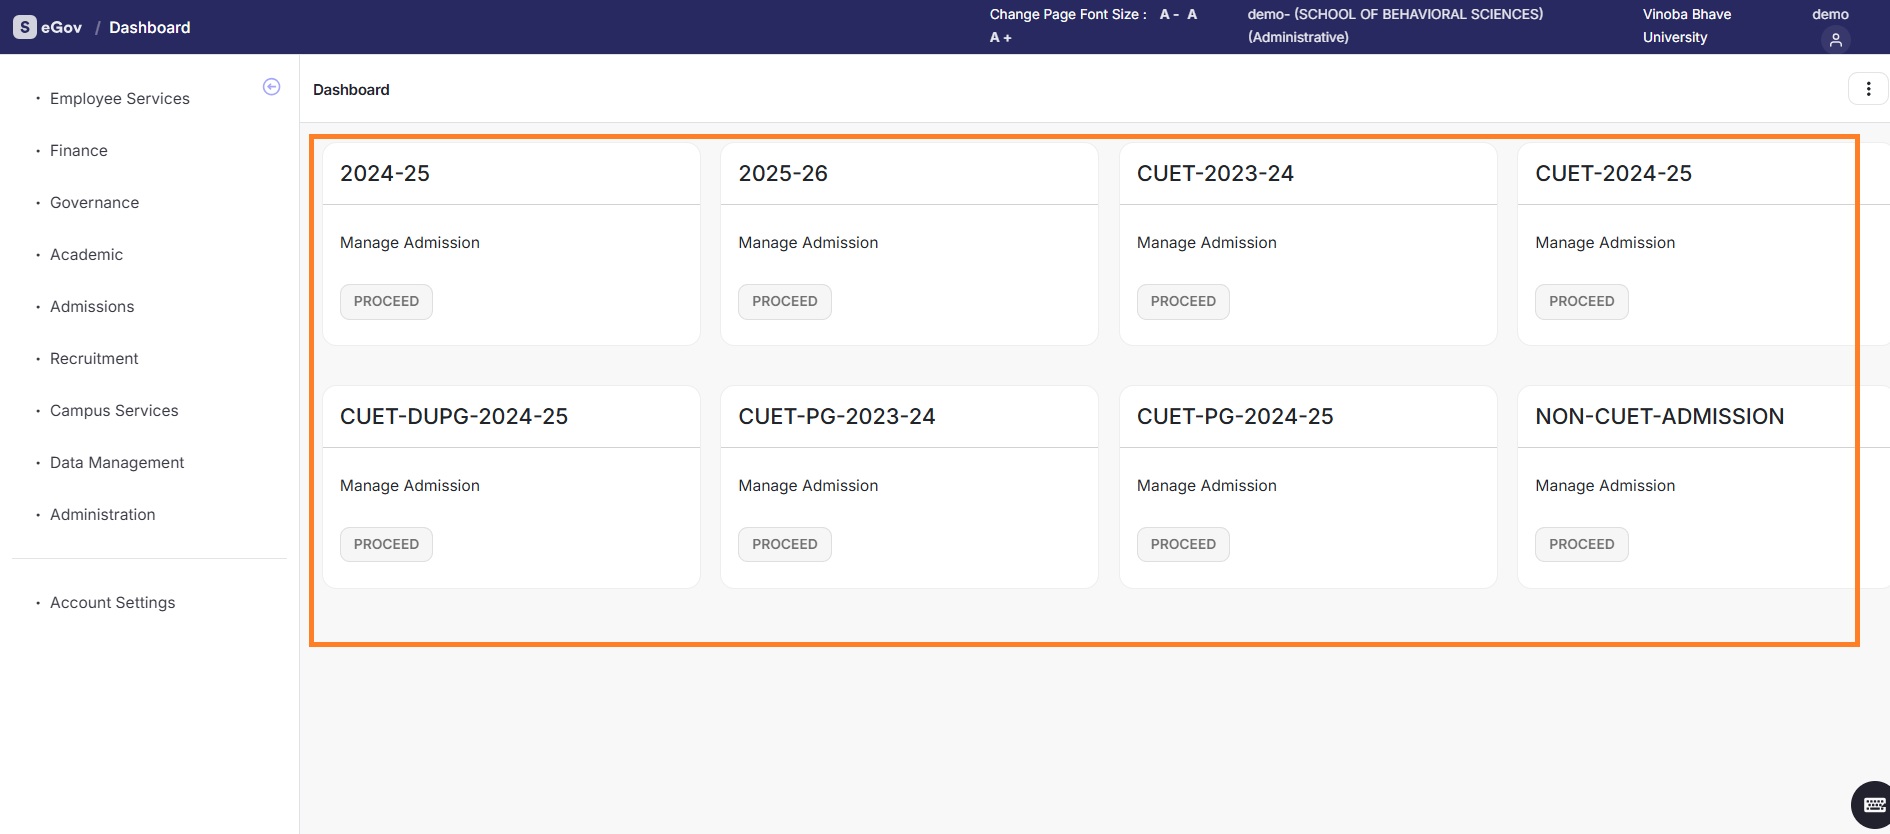
You will now see the Dashboard of the Admission module.
Configuring the portal
To set up the admission portal, please navigate to the following sections in the left navigation menu and configure the required settings:
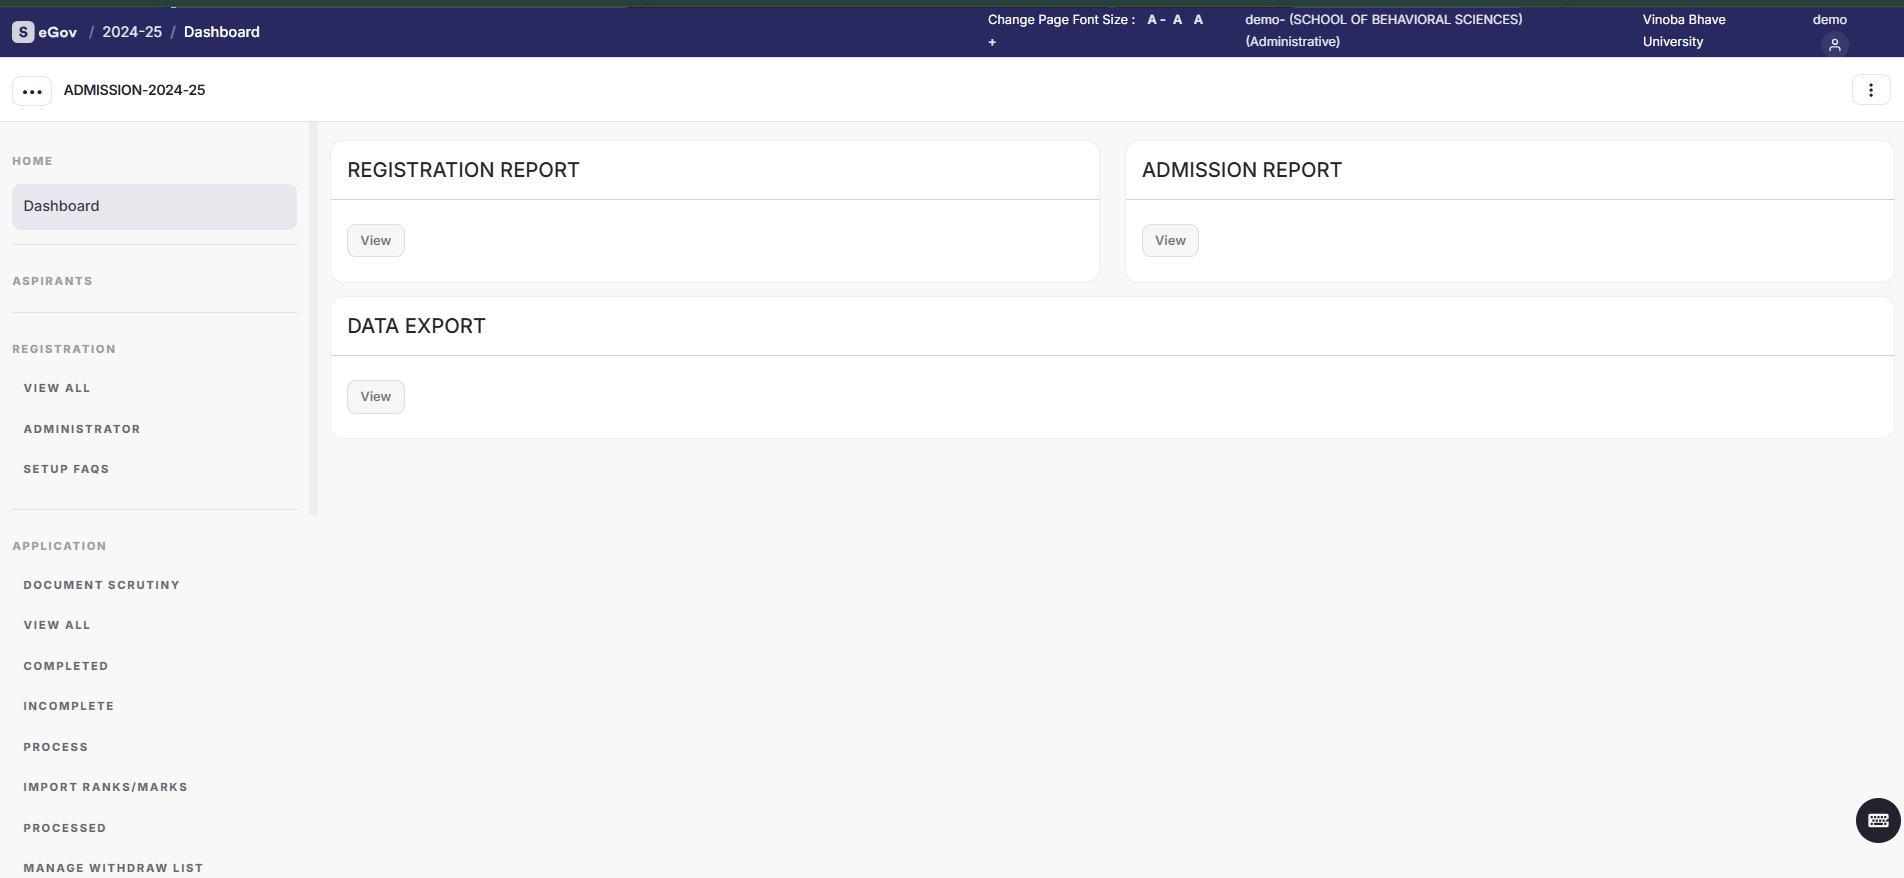
Home
Dashboard
| Name | Description |
|---|---|
| Registration Report | The Institution can download registration-related reports here. |
| Admission Report | The Institution can download admission-related reports here. |
| Data Export | The Institution can download paid & unpaid applicants registration data here. |
Registration
| Name | Description |
|---|---|
| Registered Applicants | The Institution can check all registered applicants data here |
| Administrator | The institution can reset the password and unlock the profile of the applicant here. |
Application
| Name | Description |
|---|---|
| All Applications | The Institution can check all paid or unpaid applicants data here who completed profiles and applied for the programmes. |
| Submitted Applications | The Institution can check all paid applicants data here who completed profiles and applied for the programmes. |
| Incomplete Applications | The Institution can check all unpaid applicants data here who completed profiles and applied for the programmes. |
| Document Scrutiny | The institution can process the document scrutiny from here. |
Application Processing
| Name | Description |
|---|---|
| Import Ranks/Marks | The institution can import merit rank & marks here to show in the process section. |
| Process Applications | The Institution can process the application here, such as document verification, shorlist for the admission and others. |
| Processed Applications | The Institution can process the application here, such as document verification, shorlist for the admission and others. |
Withdraw / Cancellations
| Name | Description |
|---|---|
| Manage Withdraw List | The institution can check all withdrawn admission applications here. |
| Manage Cancelled List | The institution can check all cancelled admission applications here. |
| Cancelled Registrations | The institution can check all cancelled registration applications here. |
Payment / Transactions
| Name | Description |
|---|---|
| Registration Transaction | The Institution can verify all registration payment data here. |
| Admission Transaction | The Institution can verify all admission payment data here. |
| Additional Payment | The Institution can verify all additional payment data here. |
Downloads
| Name | Description |
|---|---|
| Registration Data | The institution can download the resgitation data of the applicant here who submitted their application. |
| All Registration Data | The institution can download the resgitation data of the application submitted applicants here with completed process. |
| Data by Admission Status | **The institution can download the resgitation data of the application submitted applicants as status-wise. |
| Download Photo and Signature | The institution can download the photo & signature data of the application submitted by applicants here. |
| All Download | The Institution can find all data download requests here to download. |
Portal Content
1. Manage Portal Content
This setting manages the visibility of university-specific content in the registration portal.
| Field Name | Description |
|---|---|
| prospectus_link | Add/update the prospectus link |
| uni_website_link | Add/update the university website link |
| marquee_index | Manage scrolling text on the homepage |
| marquee_dashboard | Manage scrolling text on the user dashboard |
| intro_content_block | Edit introductory content. |
| footer_content | Customize footer details |
| contactus | Update contact details. |
2. Portal Content Labels
Universities can change the predefined label names and can copy labels from the previous portal using this setting to make the portal more user-friendly.
3. Site Configuration
This setting helps modify form-related details, such as Important Instructions and Form Declarations shown to applicants.
User Management
Configure:
The institution admin needs to assign programmes to a specific administrator user to allow the application process for assigned programmes. The institution admin needs to choose the programme, organization unit (optional) and user to configure that.
Notifications
Add Notifications The institution can add notifications via clicking the notification section, which appears on the left side admission panel. The Institution can provide a notification title, document link, and publishing date to add a notification on the admission portal.
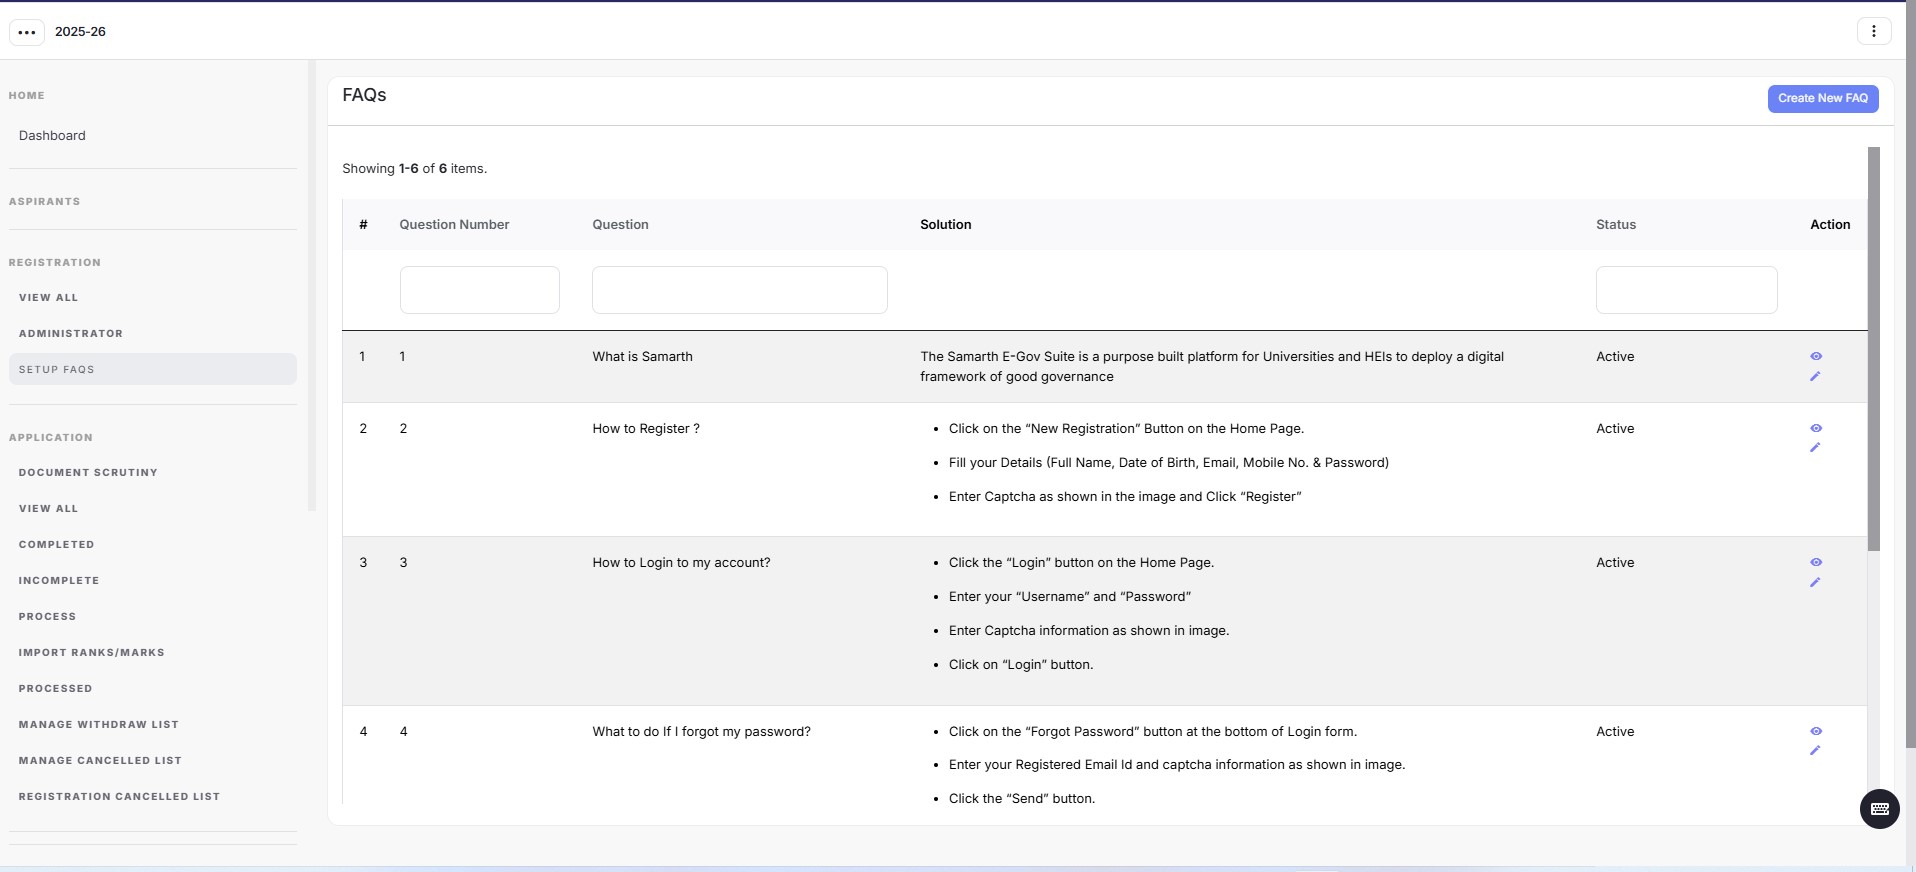
Setup FAQs
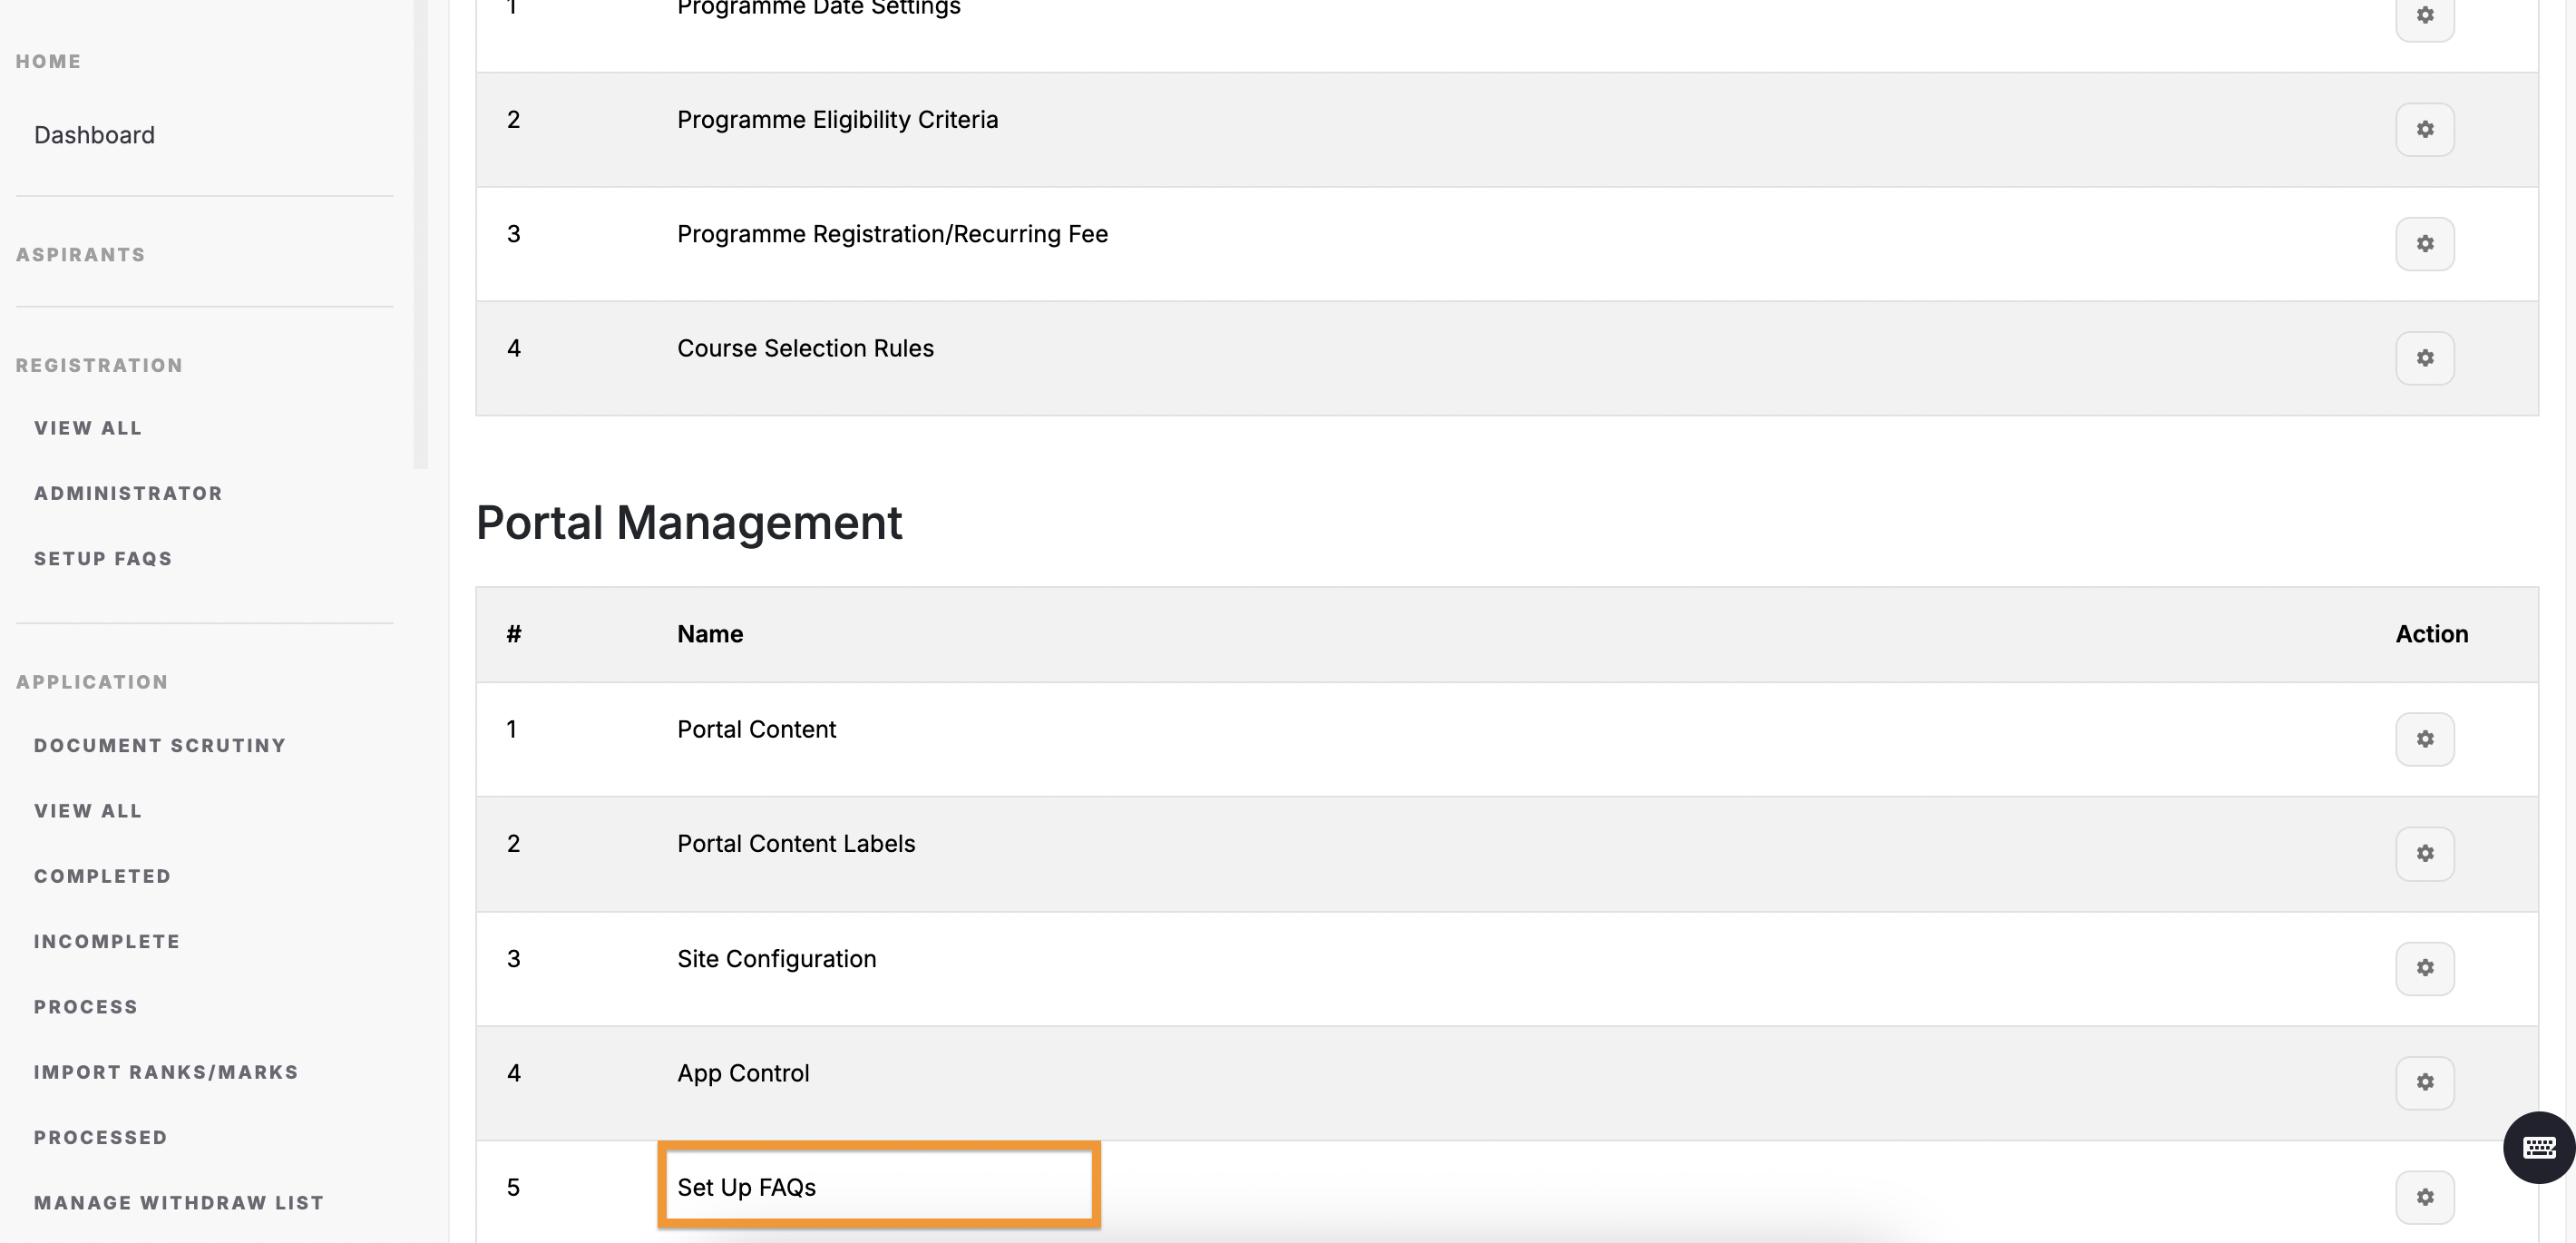
HEIs can create and manage Frequently Asked Questions (FAQs) to assist the applicants in this section.
Once all these configurations are completed, the university or higher education institutions can go live, for admission registration.
Entrance
| Field Name | Description |
|---|---|
| Entrance Center City | The Institution can add an entrance exam city here and that configuration is also required when the institution configures the Admission Criteria as entrance in programme date settings |
| Entrance Exam Center Details | The Institution can add the entrance exam here. |
| Admit Card Template | The Institution can add the admit card template here |
| Programme Center Mapping | The Institution is required to map the programme to the centre of the exam needed here. |
| Entrance Schedule | The Institution is required to programme entrance schedule here. |
| Enable Admit Card Programme Wise | The Institution is required to configure this setting when they are not allowed to choose the entrance exam city to applicants |
| Deafult Center Allocation | |
| Generate Admit Card | The Institution can generate entrance admit cards here. |
| Admit Cards List | The Institution can preview, publish and check published admit cards status here. |
| Attendance Sheets | The Institution can add an attendance sheet template & generate programmes-wise attendance sheets here. |
| Generate Attendance Sheet By Center | The Institution can generate exam centre-wise attendance sheets here. |
| Default Center/City Name | The Institution is required to configure to set the default exam city to the programmes in the absence of the city preference from the applicants. |
| Add Default Center Preference | The Institution is required to configure to set the default exam city preference to the programmes in the absence of the city preference from the applicants. |
| Bulk Admit Card uploads | The institution can upload admit card data and generate admit cards in bulk as needed. |
Settings
Admin first needs to configure basic settings applicable to all the types of admissions. “Setting” can be accessed from the bottom left corner of the left menu.
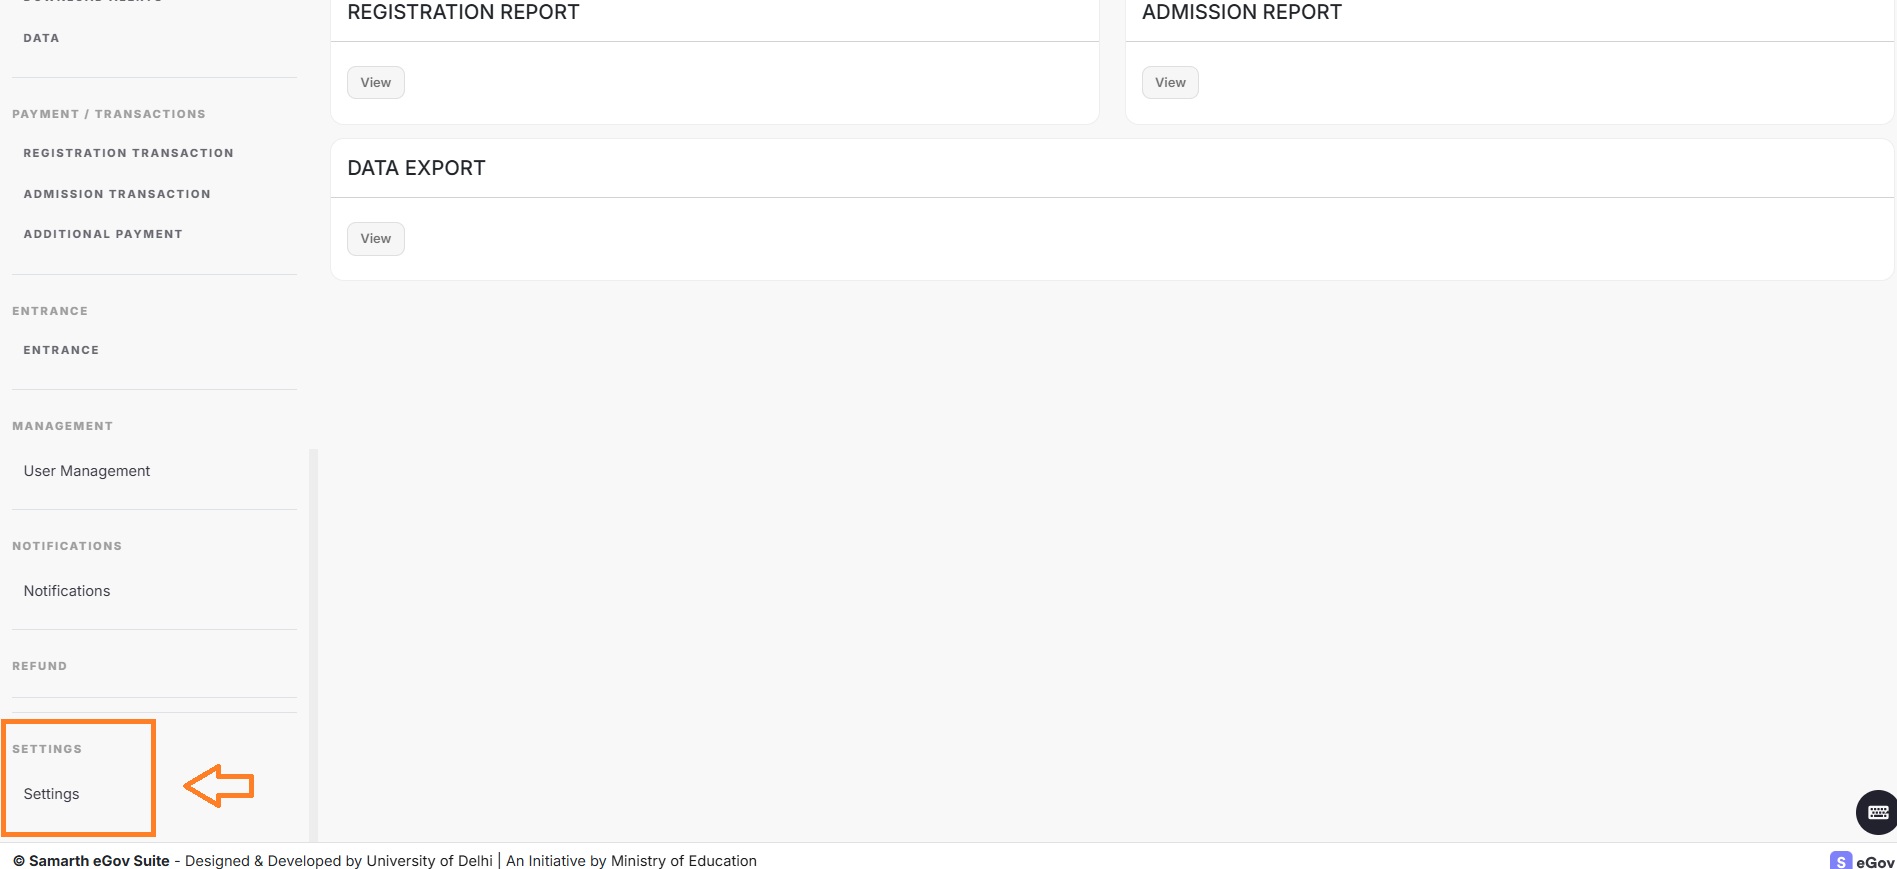
Admin needs to configure basic settings before proceeding with admissions. This can be accessed from the bottom left corner of the left menu.
Programme Date Settings
This section allows administrators to configure the admission start and end dates.
Field Details:
| Field Name | Field Type | Description |
|---|---|---|
| Programme* | Dropdown | Select the Applicable programme from the drop down. |
| Start Date* | Calendar Date & 24H Time Format | Select the start date from the calendar and add the time. |
| End Date* | Calendar Date & 24H Time Format | Select the end date from the calendar and add the time. |
| Eligibility Selection Type* | Dropdown (Radio & Checkbox) | In this field University can select if they want to allow the applicant to chose multiple eligiblity criteria or a single one |
| Status* | Dropdown (Active & Draft) | Select the Registration Status from the dropdown. Active: Activate the portal for registration, making it available for users. Draft: Save the configuration as a draft, requiring revisions before re-activating the portal. Note: If you switch from Active to Draft, you’ll need to reconfigure the settings when re-activating the portal. |
| Admission Criteria (Entrance/Merit)? | Dropdown | Select the Admission Criteria as “Entrance” if the HEI wants to allow applicants to choose exam center or else choose “Merit”. Note: If HEI selects “Entrance”, you will be required to configure additional details in the Entrance section. |
| College Preference | Dropdown (Yes & No) | If the HEI wants applicant to select college prefrence, this has to marked as Yes, or else “No” |
| College Preference Not Interested | Dropdown (Yes & No) | Mark this as “Yes” to enable “Not Interested” option in college preference section |
| College Preference Info | TEXT | |
| Course Selection Applicable | Dropdown (Yes & No) | If the HEI wants the applicant to configure the course selection option during the registration, this has to marked as “YES”. Note > Course has to mapped to programmes correctly. This activity can also be performed once the selected candidate moves to Student Lifecycle |
Note: (*) marked fields are mandatory to configure.
Programme Eligibility Criteria
Institutions must configure the Programme Eligibility Criteria to determine applicant eligibility.
- Click Add Qualification on the top right corner.
- Select the eligible programme and enter eligibility criteria.
- Click Apply Category Percentage to set percentage-based eligibility.
Programme Registration/Recurring Fee
This section allows administrators to configure programme registration and recurring fees. Click Programme Registration/Recurring Fee. A modal pops up. Select the eligible programme & applicant category and add it’s registration/recurring fee as mentioned in the admission prospectus.
- Registration fee: one-time registration fee of the programme.
- Recurring fee: subsequent registration fee on variable amount of the programme.
Click bulk update registration fee & recurring fee to update the registration/recurring fee in bulk manner by selecting the required programme
Seat Configuration
| Field Name | Description |
|---|---|
| Seat Categories | The Institution can add admission seat categories here. |
| Add Programme Seats | The Institution can define the admission seat for applicants categories. |
Fee Configuration
| Field Name | Description |
|---|---|
| Fee Categories | The Institution can add admission fee categories here. |
| Add Master Fee Head | The Institution can add the fee head for admission fee bifurcation. |
| Map Fee Heads With Programme | The institution must configure the admission fee for the programme by category and fee head, ensuring the fee head is mapped to the appropriate programme and category. |
Utilities
| Setting Name | Description |
|---|---|
| Generate Enrollment Number | The Institution can generate system based enrolment here. |
| Upload Enrolment Data | The institution can upload the manual data of enrollment here. |
| Download Enrolment Data | The institution can download the applicant’s data from here to upload enrollment data. |
| Move Applicants to SLC | The institution can move the applicants to SLC from here after enrollment generation. |
| Admission Logs | The Institution admin has the right to check admission-related logs. |
| University/School Board List | The Institution can add the board name here when they allow the applicant to choose a board name from the dropdown. |
| University List | The Institution can add the University name here when they allow the applicant to choose the university name from the dropdown. |
Payment Gateway
| Field Name | Description |
|---|---|
| Registration\Admission Payment Gateways | The Institution can check their payment gateway MID details here to verify the integrated payment gateway on the admission portal for registration fee collection. |
| Admission Payment Gateways | The Institution can check their payment gateway MID details here to verify the integrated payment gateway on the admission portal for admission fee collection. |
| Additional Payment Gateways | The Institution can check their payment gateway MID details here to verify the integrated payment gateway on the admission portal for additional fee collection. |
CUET Admission Configuration Settings
CUET UG Settings
CUET settings are an important and integral part of the CUET admission configuration process. It requires adding rules according to the programmes ruled by the University. Programmes need to be added and mapped according to the CUET-based subject bifurcation on the CUET website.
Add rule settings Purpose: To create a new rule in the portal according to the eligibility provided in the CUET portal.
Note: Languages (Section IA/IB), domain-specific subjects (Section II) and General test(Section III) are already added to the portal. University/Institution needs to derive a valid rule out of them.
The institution needs to launch the Admission after this need to open settings and then the institution able to visible to CUET settings (same as visible in the screenshot)
Add rule:
- To Add a new rule, click on the gear-like button.
- Click on Add Test Paper Rule.
Add the Name of the subject in the box.
- Add the Description in the box.
- Select the subject as draft/published.
- Click on the Save button to add the subject rule.
After configuring rules according to the programme listed on the website, users need to add a role clause to the given rule after aligning the subject with the particular programme added by the University.
- To Add clause:
- Click on Add clause.
Select the Rules added.
- Select the Paper type or Group Type.
- Select Status as Draft or Published.
- Click on the Save button to add the subject clause.
Add rule groups:
- Purpose: To create groups of the subject which have an “OR” condition**
- For example: if the Rule is either mathematics or biology then the user needs to create a group of mathematics/biology, and need to select both papers in the group.
- To Add rules groups, click on the gear-like button.
- Click on Add Test Paper Group.
Add the Name of the subject in the box.
- Add the Description in the box.
- Select the Papers from the list.
- To add Papers to your programme selection criteria, Select status as Draft or Published Click on the Save button to add the subject rule.
After Adding all the rules, map them according to the created groups.
Map Rule with Groups:
- Purpose: To map the papers and groups with the rule which have an “AND” condition. For example: if the rule is “Physics and Chemistry and Mathematics/Biology” Then the user needs to map the rule with two papers: Physics and Chemistry and with one group Mathematics/Biology. [Note: The group count will be filled as per the requirements of the best subject. (e.g.: best of 1, best of 2, best of 3 etc.)]
- The final Rule will be: Physics AND Chemistry AND Mathematics OR BIOLOGY
- To Map Rule with a Group, click on the gear-like button.
- Click Add Test Paper Rule Clauses.
Select the Rules added.
- Select the Paper type or Group Type.
- Select Status as Draft or Published.
- Click on the Save button to add the subject clause.
Note: It is required to map the eligibility of the programme criteria given by the CUET programme and the University Programme existing in the programme module.
Map Rules with Samarth Programmes: To map Programmes, click on Map Rule To Programme.
Select Programme.
- Select Rules from the list.
- Select Status as Draft/Pending/Rejected/Published/Disabled/Delete.
- Click on the Save button to add the Programme.
Check eligibility & rules
- There are 10 test Paper columns added to the Rule test criteria and each can be mapped according to CUET Papers.
- To add eligibility & rule criteria, click on the gear-like button.
- Select added CUET papers.
- Add marks required for the selected paper.
- Fill out all the test papers and Click on Submit.
- With the completion of all CUET-based configurations, the University can now process its CUET-based admission process.
CUET PG Settings
The institution needs to launch CUET-PG in the Admission after this need to open settings and then the institution able to visible to CUET settings (same as visible in the screenshot)
Click on the “Setting action button " of the “Map Samarth Programme with CUET Paper Code”
Admin needs to click on the Map Programme button of the CUET Programme and University Programme Map Setting.
Universities need to select the CUET Paper Code and map the Programme and select the Status as Published and click on Map Programme.
NCET / ITEP Settings
NCET settings are an important and integral part of the NCET admission configuration process. It requires adding rules according to the programmes ruled by the University. Programmes need to be added and mapped according to the NCET-based subject bifurcation on the NCET website.** Add rule settings Purpose: To create a new rule in the portal according to the eligibility provided in the NCET portal. The institution needs to launch the Admission after this need to open settings and then the institution able to visible to NCET settings (same as visible in the screenshot)
Add rule:
- To Add a new rule, click on the gear-like button.
- Click on Add Test Paper Rule.
Add the Name of the subject in the box.
- Add the Description in the box.
- Select the subject as draft/published.
- Click on the Save button to add the subject rule.
After configuring rules according to the programme listed on the website, users need to add a role clause to the given rule after aligning the subject with the particular programme added by the University.
- To Add clause:
- Click on Add clause.
Select the Rules added.
- Select the Paper type or Group Type.
- Select Status as Draft or Published.
- Click on the Save button to add the subject clause.
Add rule groups:
- Purpose: To create groups of the subject which have an “OR” condition
- For example: if the Rule is either mathematics or biology then the user needs to create a group of mathematics/biology, and need to select both papers in the group.
- To Add rules groups, click on the gear-like button.
- Click on Add Test Paper Group.
Add the Name of the subject in the box.
- Add the Description in the box.
- Select the Papers from the list.
- To add Papers to your programme selection criteria, Select status as Draft or Published Click on the Save button to add the subject rule.
After Adding all the rules, map them according to the created groups.
Map Rule with Groups:
- Purpose: To map the papers and groups with the rule which have an “AND” condition. For example: if the rule is “Physics and Chemistry and Mathematics/Biology” Then the user needs to map the rule with two papers: Physics and Chemistry and with one group Mathematics/Biology. *[Note: The group count will be filled as per the requirements of the best subject. (e.g.: best of 1, best of 2, best of 3 etc.)]
- The final Rule will be: Physics AND Chemistry AND Mathematics OR BIOLOGY
- To Map Rule with a Group, click on the gear-like button.
- Click Add Test Paper Rule Clauses.
Select the Rules added.
- Select the Paper type or Group Type.
- Select Status as Draft or Published.
- Click on the Save button to add the subject clause.
It is required to map the eligibility of the programme criteria given by the NCET programme and the University Programme existing in the programme module.
*Map Rules with Samarth Programmes: To map Programmes, click on Map Rule To Programme.
Select Programme
- Select Rules from the list.
- Select Status as Draft/Pending/Rejected/Published/Disabled/Delete.
- Click on the Save button to add the Programme.
Check eligibility & rules
- There are 10 test Paper columns added to the Rule test criteria and each can be mapped according to NCET Papers.
- To add eligibility & rule criteria, click on the gear-like button.
- Select added NCET papers.
- Add marks required for the selected paper.
- Fill out all the test papers and Click on Submit.
- With the completion of all NCET-based configurations, the University can now process its NCET-based admission process.
Frequently Asked Questions (FAQs)
Q1. What types of admission portals does Samarth provide?
A1. Samarth eGov offers a variety of admission portals tailored to different admission processes. These include:
- CUET UG Admission Portal – For undergraduate admissions via the Common University Entrance Test (CUET-UG).
- CUET PG Admission Portal – For postgraduate admissions via the Common University Entrance Test (CUET-PG).
- NCET Admission Portal – For National Common Entrance Test-based admissions.
- Merit/Entrance-based Admission Portal – For institutions conducting merit-based or entrance-based admissions.
- DACE Admission Portal – For admission under the Dr. Ambedkar Centre of Excellence (DACE) scheme.
- JEE/JOSAA Admission Portal – For engineering admissions through JEE/JOSAA.
- FSR Admission Portal – For processing admissions of foreign students.
- DDE/CDVE/ODL/CDOE Admission Portal – For admissions under Distance and Online Learning programs.
Q2. What are the prerequisites for using an admission portal?
A2. Before using the Samarth Admission Portal, the following prerequisites must be met:
- Program Configuration: The university must configure all academic programs in the Program Management module.
- Mapping of Organizational Units (OUs): Programs must be mapped to respective Organizational Units (departments, colleges, or schools) to ensure seamless admission processing.
Q3. Can we verify applicants' uploaded documents?
A3. Yes, the portal allows universities to verify the authenticity of documents uploaded by applicants. The verification process includes:
- Checking the uploaded documents for validity.
- Updating the verification status (Accepted/Rejected/Pending).
- Providing feedback to applicants if corrections are required.
Q4. Can we collect fees online using the Samarth Admission Portal?
A4. Yes, the Samarth Admission Portal integrates with multiple payment gateways to facilitate the collection of:
- Registration Fees – Fees collected at the time of application submission.
- Admission Fees – Fees required upon admission confirmation.
- Additional Fees – Any extra charges applicable for specific courses or facilities.
Q5. Our university collects admission fees offline. Can we still use the Samarth Admission Portal?
A5. Yes, if the university prefers offline fee collection, administrators can manually update payment details on the portal for record-keeping and admission tracking purposes.
Q6. How can we collect additional fees from admitted students?
A6. The university can use the “Additional Payment” feature in the portal to collect extra fees from already admitted students, ensuring proper accounting and record-keeping.
Q7. We conduct an entrance exam for admissions. How can we manage this on the portal?
A7. The portal supports the offline entrance exam process by:
- Allowing applicants to download admit cards.
- Generating attendance sheets for exam day verification.
- Recording entrance scores manually for result processing.
Note: The Samarth portal does not provide an online exam facility.
Q8. Can we download reports from the Samarth Admission Management System?
A8. Yes, the system provides the ability to generate and download various reports, including:
- Registration Reports – List of applicants who have registered.
- Admission Reports – Data on confirmed admissions.
- Payment Reports – Breakdown of collected fees.
These reports can be downloaded in Excel/PDF formats for further analysis.
Q9. Our university admits students from foreign countries. Which portal should we use?
A9. The Foreign Student Registration (FSR) Portal is designed specifically for international applicants. It supports:
- Submission of foreign qualifications.
- Visa-related document uploads.
- Fee payment processing in foreign currency (if applicable).
Q10. Can we collect NEET scores on the portal for admissions?
A10. Yes, the portal allows universities to collect and process scores from national-level exams such as NEET for medical admissions.
Q11. Can we publish notifications on the Samarth Portal?
A11. Yes, universities can upload important notifications and announcements, such as admission deadlines, merit list publications, and counseling schedules.
Q12. Can we upload the university prospectus on the Samarth Portal?
A12. Yes, the portal provides an option to upload the university prospectus so applicants can access detailed information about courses, admission procedures, and eligibility criteria.
Q13. Can we customize fields in the admission form?
A13. Limited customization is available. Universities can submit specific customization requests to the Samarth support team, and feasible changes will be implemented based on technical feasibility.
Q14. Can we collect Aadhaar numbers in the application form?
A14. No, due to UIDAI guidelines, Aadhaar details cannot be collected. However, applicants can provide alternative ID proofs such as passport, voter ID, or driving license.
Q15. Can we manage the application form by department?
A15. Yes, the portal supports department-specific login access, allowing each department to manage and process applications independently.
Q16. Our university has a Non-CUET admission portal for UG and PG admissions and now wants to admit PhD students. Do we need a separate portal?
A16.
- If there are no additional profile fields required for PhD admissions, universities can use the same Non-CUET portal.
- If extra fields are required that are not configurable per program, a new portal will be deployed for PhD admissions.
Q17. Can the portal generate a merit list?
A17. Yes, the university can submit merit list criteria, and the Samarth team will assess feasibility. If feasible, the system will generate the merit list automatically.
Q18. Can the university upload the merit list on the portal?
A18. Universities can upload the merit list:
- On the university website, with a link added to the portal OR
- Directly on the Samarth Portal, under the Notification Section, for applicants to download.
Glossary
| # | Term | Definition | Module Reference |
|---|---|---|---|
| 1 | Admission Portal | An online platform where applicants can submit their applications, track their application status, receive notifications, and access documents. | Admission Administrative Portal |
| 2 | Admit Card | Hall ticket to give the entrance exam for admission. | Admission Administrative Portal (Entrance section) |
| 3 | Admission Report | An admission report refers to a document or summary that provides detailed information about the admission process, including the number of applications received, selected candidates, enrolment statistics, and other relevant data. | Admission Administrative Portal |
| 4 | Application Status | The current progress or state of an application (e.g., submitted, under review, accepted, rejected, or awaiting documents). | Admission Administrative Portal |
| 5 | Admissions Workflow | The structured process by which applications are reviewed, decisions are made, and students are admitted typically involves multiple steps and approval stages. | Admission Administrative Portal |
| 6 | Attendance Sheet | An attendance sheet about the entrance exam is a record used to track the presence of candidates during the exam. It typically includes details like candidate names, roll numbers, and check-in times to ensure all registered candidates are accounted for. | Admission Administrative Portal (Entrance section) |
| 7 | Correction Window | A correction window in admission refers to a designated period during which applicants can make changes or correct errors in their submitted application forms, such as updating personal details, marks, or preferences. | Admission Administrative Portal |
| 8 | Counselling | Counseling in admission is the process where students are allotted seats in educational institutions based on their ranks, preferences, and availability, often involving multiple rounds. | Admission Administrative Portal |
| 9 | Document Verification/Scrutiny | The process of confirming the authenticity of submitted documents such as identification proofs or educational documents. | Admission Administrative Portal |
| 10 | Eligibility Criteria | The set of requirements an applicant must meet to be considered for admission, such as academic qualifications, age limit, and test scores. | Admission Administrative Portal |
| 11 | Enrolment Number | An enrolment number in admission is a unique identifier assigned to a student upon registering at an educational institution. | Admission Administrative Portal |
| 12 | Entrance Exam | A test or assessment is administered by the institution to evaluate applicants’ knowledge or skills in specific areas relevant to the program. | Admission Administrative Portal (Entrance section) |
| 13 | Merit List | A merit list in admissions ranks candidates based on their academic performance or entrance exam scores, determining eligibility for admission. | Admission Administrative Portal |
| 14 | Organizational Unit | An Organizational Unit in admission ERP refers to a specific department, division, or entity within an educational institution that manages various aspects of the admission process, such as academic departments, administrative offices, or campuses. | Admission Administrative Portal |
| 15 | Programme | Programme refers to a specific course of study or academic curriculum offered by an educational institution, such as a degree, diploma, or certificate program. | Admission Administrative Portal |
| 16 | Student Life Cycle | The student life cycle in admissions refers to the stages a student goes through, from application submission, admission granted, and enrolment assignment. | Admission Administrative Portal |